📮 Save this recipe for later!
Background
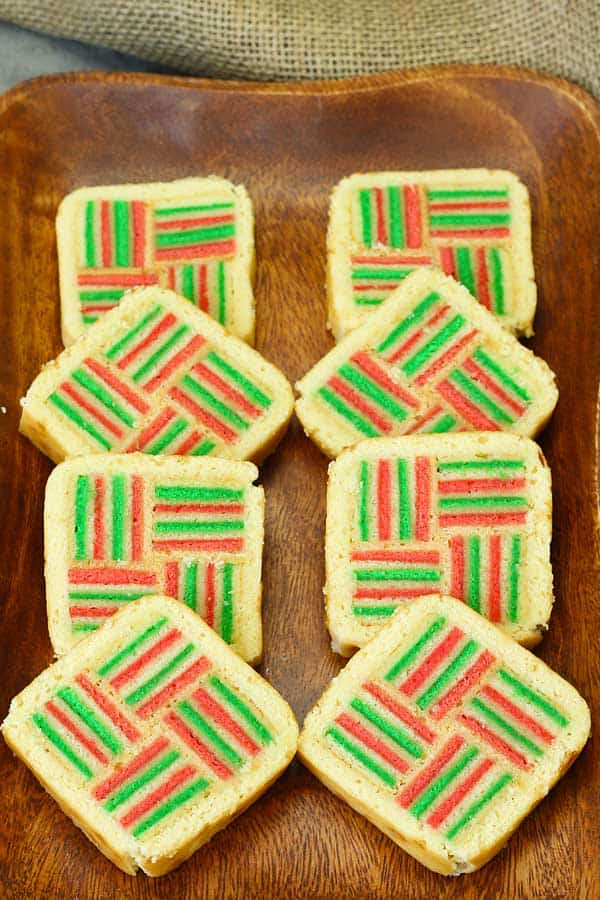
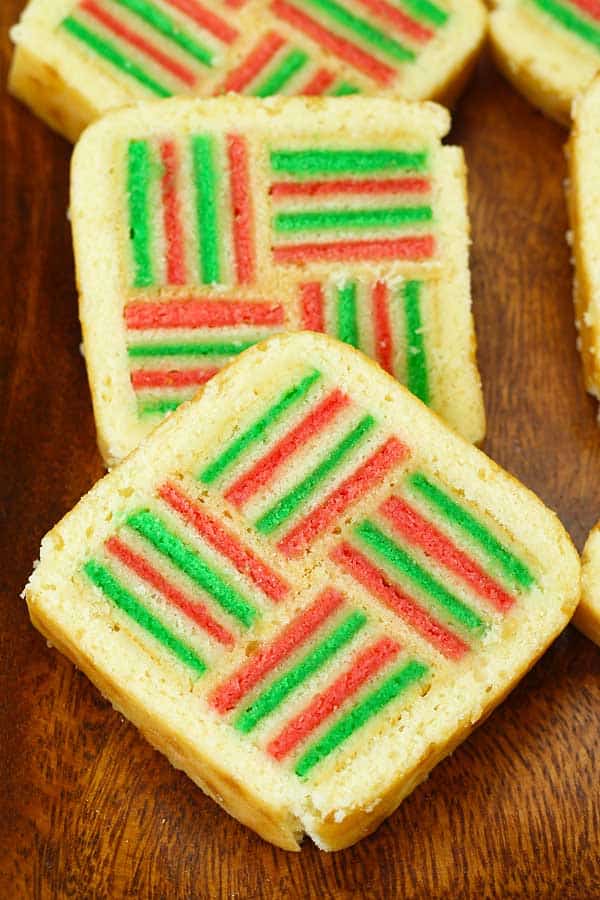
Sarawak layer cake is exactly as the name says, a cake that has various layers. The layers are arranged in a way to create beautiful patterns with wonderful colours.
The patterns can range from a simple one to a very complicated one. It's said that a Sarawak layer cake has to have at least 2 different colours in it.
This cake is made famous in Sarawak, Malaysia and is traditionally served during special occasions. The layer cake is originally from an Indonesian cake that's called Betawi cake. In time and after alterations by the Sarawakians, the cake there is referred as Sarawak layer cake.
The Traditional Way
The traditional Sarawak layer cake requires a lot of eggs. For example for a 9 inch (23 cm) square pan the batter needs 14 large eggs.
Yep, you read me correctly. 14 large eggs. Yikes!
The high amount of eggs makes the cake so moist, soft, rich and of course delicious. If it feels like a sin, it surely is delicious. Right? Haha!
Well today I'm sharing my recipe that doesn't require that high amount of eggs and it tastes as delicious with soft, moist and rich texture.
My Less-Eggs Way
I've been experimenting to make this less-eggs Sarawak layer cake for a while and I'm just so excited to share with you the result. As you can see in the photo, the cake just looks wonderful and it has all the characteristics of a delicious Sarawak layer cake.
And I'm only using half of the amount of eggs. 7 eggs. Yes.
To keep the buttery taste and still maintain the moistness without so much eggs, I'm combining the butter with sunflower oil. Sunflower oil or any natural flavoured oil really helps in keeping the cake moist.
The other ingredients that I use in this recipe that help in keeping the cake moist, tender and soft are corn starch, condensed milk and brushing each layer with a mixture of butter and condensed milk.
And if you noticed in the video, after baking each layer I will first lightly smooth out the surface before brushing it with a mixture of butter and condensed milk. Why?
I like to smooth out the surface to get that straight line look when we slice it. Smoothing it out will get rid of any bumps on the cake that appear while baking.
The Design
Like I mentioned earlier, a Sarawak layer cake has that unique and particular look which is the pattern designs and the colours.
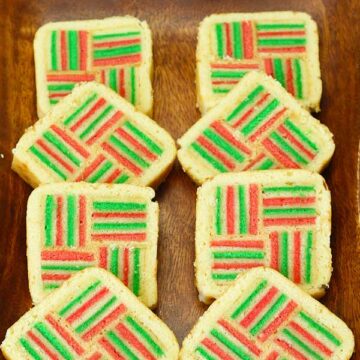
For this recipe I'm not going crazy with both. I'm just using 2 colours and a simple design. Here's how I do it.
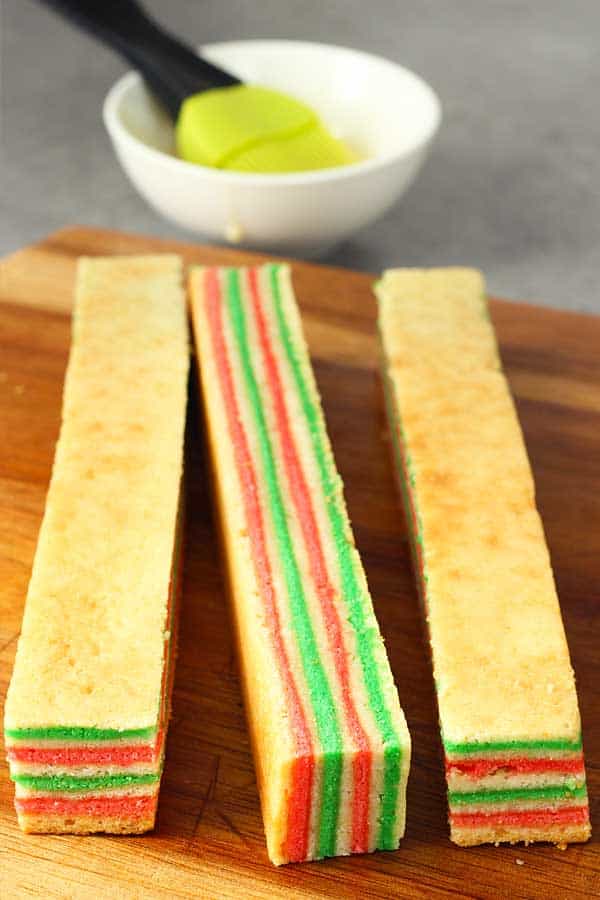
With a 9 inch (23 cm) square pan, I slice the cake into several strips of equal size. This is to make sure that when I arrange the strips together, they fit like a glove.
What I do first is measure the height of the cake. Since the height varies from how I make mine and you make yours, so it depends on each cake's height. The important thing is, measure the height.
Then I cut the cake into strips with that height measurement so that I get a perfect square. And of all the strips that I cut, I choose my best 4. And yes, I have 2 strips balance. A cook's treat.
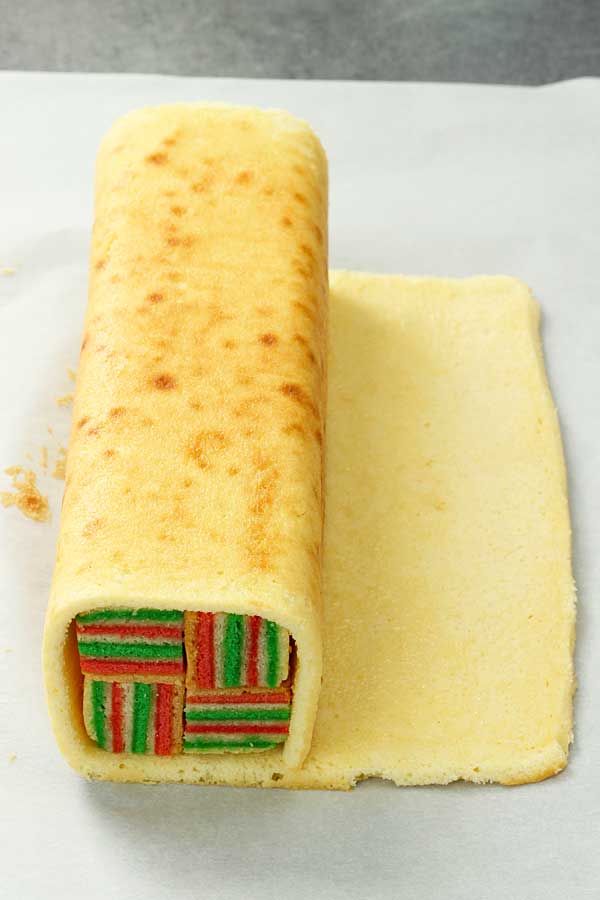
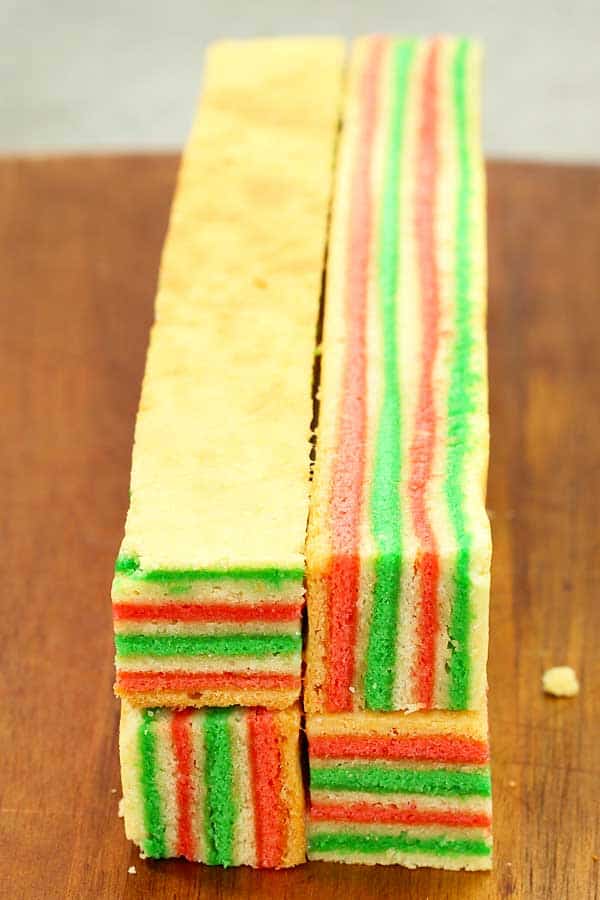
And then I brush the sides of the strips that will touch each other with some condensed milk and put them together as you can see in the photo. The condensed milk helps the strips stick to each other. You can use marmalade of your choice if you want.
To help the 4 strips maintain their shape, I like to wrap them tightly with a cling film and chill it in the fridge for 30 minutes. Then I continue wrapping them with another thin piece of cake, that has also been brushed with condensed milk. And again I chill it in the fridge only this time for minimum 2 hours.
Then there's nothing left to do but to trim off both ends and slice the beautiful Sarawak layer cake.
I have to admit, there's quite a several steps to this recipe but I'm telling you. It's worth it. Do give it a try and let me know what you think. Enjoy!
More Cake Recipes
- No-bake chocolate biscuit cake (kek batik keju)
- Summer berry cake
- Olive oil orange cake
- Easy carrot cake
Video
📖 Recipe
Sarawak Layer Cake
Ingredients
- 1 cup unsalted butter (226 gr), room temperature
- 1 cup sugar (200 gr)
- ⅓ cup Sunflower oil (80 ml)
- ⅓ cup condensed milk (110 gr)
- 2 teaspoon vanilla extract
- 7 egg yolks , room temperature
- 1 ⅓ cup all purpose flour (170 gr)
- 1 cup corn starch (130 gr)
- 7 egg whites , room temperature
- ¾ cup sugar (150 gr)
- ¼ teaspoon cream of tartar
- 2 tablespoon condensed milk (40 gr), for brushing
- 3 tablespoon unsalted butter (45 gr), for brushing
- red food coloring
- green food coloring
Instructions
The Base Batter
- Sift both flours into a bowl and set aside. Add the ingredients for brushing into a bowl and heat in microwave until the butter melts. Mix well and set aside.
- Add butter and sugar into another bowl. Whisk until pale and fluffy, around 5 minutes. Then add in oil, condensed milk and vanilla extract. Mix well.
- Add egg yolk 1 by 1, mixing well after each addition. Add in flour mixture in 2 additions, mixing well after each addition. Don't over mix. Set aside.
- In another bowl, add in egg whites and whisk until foamy. Then add in sugar and cream of tartar. Whisk until firm peaks or until the mixture doesn't fall when you flip the bowl.
- Add half of meringue into the flour mixture and using a spatula, gently fold everything together until well combined. Add the rest of the meringue and continue folding to combine. Set aside.
The Coloured Batter
- Weight 10.5 oz (300 gr) base batter each into 2 different bowls.
- Take 2 tablespoon of batter from 1 bowl and mix it with red food colouring. Then add the coloured mixture back into the bowl and fold everything together until well mixed.
- Do the same with the other bowl using green food colouring. Set aside.
Baking and Layering
- Preheat oven at 340ºF (170ºC) using grill function. Line the base of a 9 inch (23 cm) square pan. Line the base of a 13x9 inch (33x23 cm) rectangle pan. Don't grease the sides.
- Put 3.5 oz (100 gr) of plain batter into the 9 inch (23 cm) pan and spread it evenly. Bake for 5 minutes or until fully cooked. Rotate the pan during half baking time.
- Remove pan from the oven. Immediately smooth out the surface by lightly pressing it using the bottom of a glass. Then brush the surface with butter and condensed milk mixture.
- Now add 3.5 oz (100 gr) of red batter and repeat the same process. Alternate the colours with plain batter in between. You will get 2 layers of red, 2 layers of green and 5 layers of base in between them.
- After baking the final layer, leave the pan to cool for 10 minutes. Then run a knife on the sides of the pan to loosen the cake. Flip the cake onto a smooth tray with a baking sheet and set aside to cool completely. Note: Use smooth tray so that there are no lines marked on the surface of the cake.
- Add 8.8 oz (250 gr) of base batter into 13x9 inch (33x23 cm) and spread evenly. Bake for 5 minutes of until fully cooked. Rotate during half baking time.
- Remove from the oven and leave for 2 minutes. Then flip it onto a smooth tray with a baking sheet. Leave to cool completely. Wrap with cling film to prevent it getting dry while not using.
Assembling
- Trim off the edges for the layer cake. Measure the height of the cake. Slice the cake into strips using the height measurement as the width, resulting a perfect square long strips. Choose the best 4 strips.
- Arrange the 4 strips so that the designs are contrast to each other. See the video for guidance. Brush the sides of the strips that will touch each other with some condensed milk and attach them together into a log. Wrap tightly with cling film and chill in the fridge for 30 minutes so that it holds its shape better.
- Trim off 1 end of the rectangle cake. Place the log on top of the cake at the trimmed edge. Gently roll the log, covering it all sides with the cake. Trim off the balance of the cake.
- Wrap the log tightly with cling film and chill in the fridge for minimum 2 hours. Before slicing, trim off both ends to get that perfect and neat look. Slice and serve. Enjoy!
Notes
2. Oven temperature varies between ovens so keep an eye on your cake.
3. Wrap the wrapper cake with cling film to avoid it getting dry while waiting for the layer cake to cool.
4. You will have balance of cake strips. Incorporate them in your cake design if you want or save them as cook treats ;).
Nutrition Facts
The nutrition facts provided are an estimate per serving. Accuracy is not guaranteed.






Helen says
I love these cakes. Especially when they cut it diagonally and create different designs. I commented on your YouTube video to see if you know where to purchase that square cutter some have used to cut it diagonally?
Thank you for this video. It is straightforward and it is such a beautiful cake you created. I love the colors! 👍🏼
Bea & Marco says
Hi, Helen! I don't know where to purchase the cutter, sorry! My way is meant to be simple without using so many difficult-to-find tools. I'm happy to hear that you find the video helpful, thank you for your comment! Sorry for the late reply! We had to move house on short notice, but we're now slowly back at work!
Patrice says
Such a beautiful dessert. Is it possible to make ahead and freeze?
Bea says
Thanks, Patrice! Yes, it is.
Jaime says
My friend challenged me to make this cake since I'm baking non stop during this pandemic time. It was one of the most satisfying recipe that I have tried. I have sent a picture to your instagram. Thanks for sharing.
Love Jaime
Bea says
Really? Haha! Well I'm happy that you gave it a go. It's a bit laborious but yep, totally worth it. And yes, I've seen the photo, it looks so amazing. Thank you Jaime!
Pearl says
Just tried it this afternoon and it's a success! Made a rainbow coloured combination. Thank you so much for the recipe.
Bea says
Yeay! That's great, thank you so much for your feedback Pearl!
Elizabeth Bramkamp says
This cake sounds amazing. I definitely want to attempt this. I do have a question. You state to use the 'grill' function of the oven? Is this the top broiler unit or do I bake?
Thank you.
Bea says
Hi Elizabeth! Yes, it's top broiler function. I really hope you'd give it a try! Thanks!
Elizabeth Bramkamp says
Thank you for the quick response. I will be making this and will let you know.
Lucy Krein says
I always wanted to make this beautiful cake and thanks to your video I finally did it!!!!
Your video tutorial was very helpful. My cake turned out almost as beautiful as yours. LOL! It was delicious!
Bea says
Awesome, I'm glad to hear that you find it useful. And no worries, your next one will surely be amazing! Thank you for your feedback Lucy! XO
Velda says
I made it with Gluten free flour and it worked really well, Thank you so much for the recipe
Bea says
That's nice to know Velda, thank you! XO
Deni Mar says
Hello! I have been searching on how to make this layer cake and I found it!!
I made the cake last weekend and it came out sooo delicious! It was laborious but like you said it was worth it.
Thank you!
Bea says
Oh that's so exciting to know! Yes, it's totally worth the effort. Thanks for your feedback Deni! XO