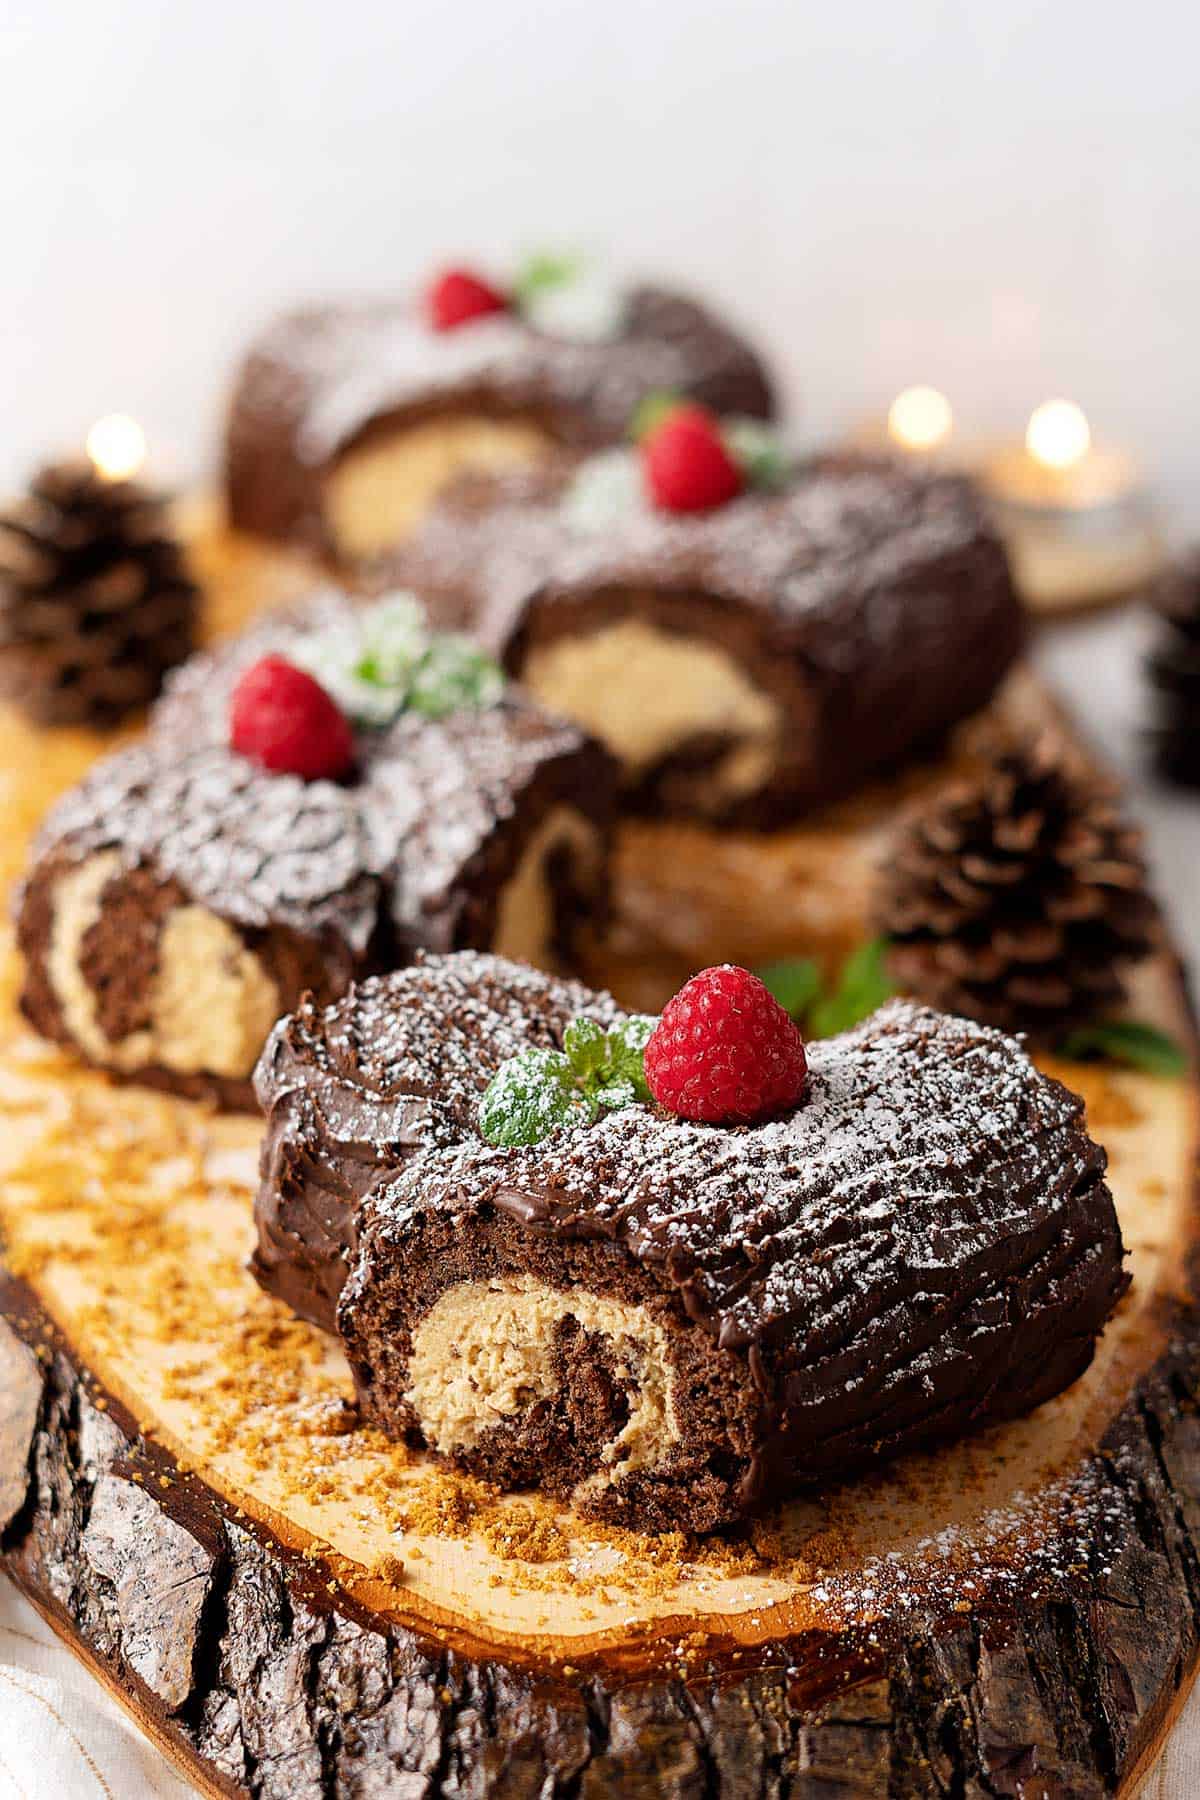
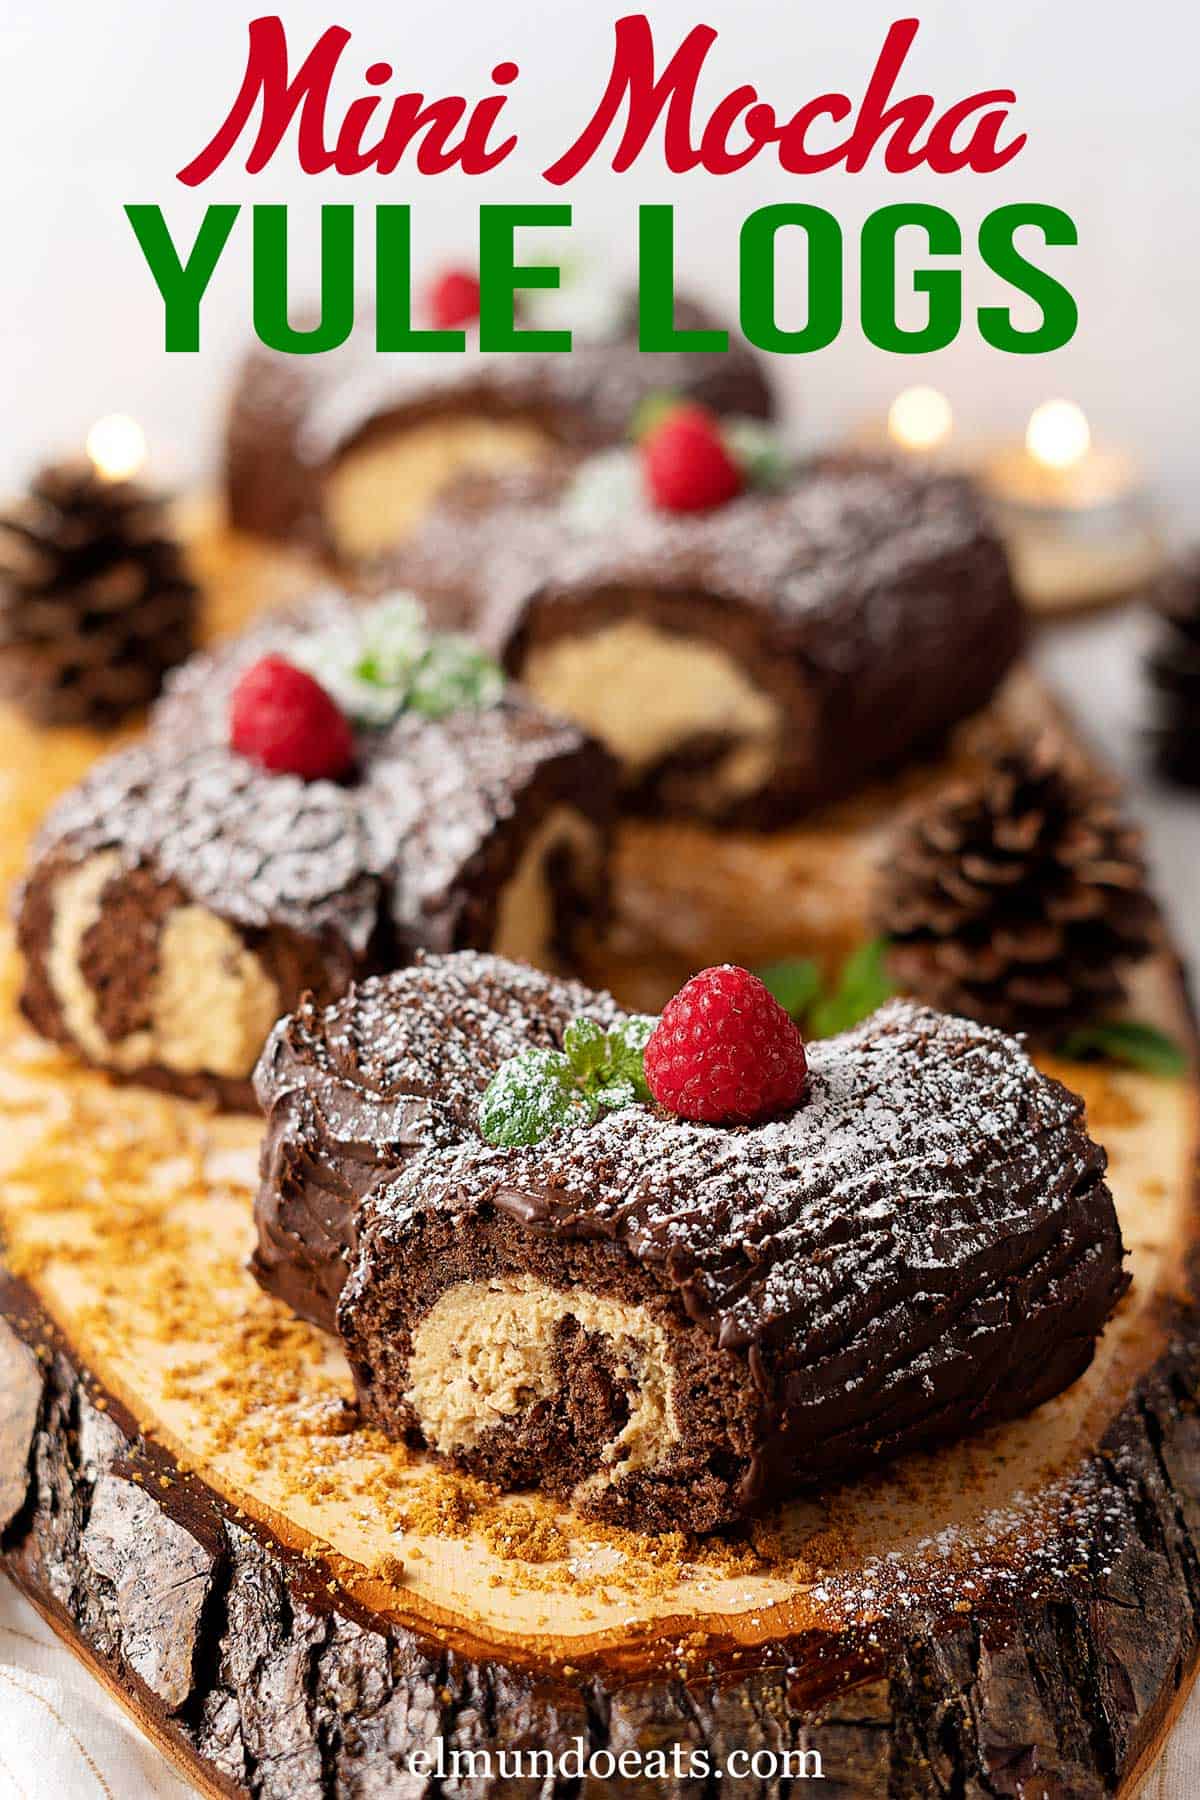
It is not as difficult as you might be thinking right now. Seriously, it's not. Have faith and trust me, these mini mocha yule log cakes are easy to make and you'd be surprised at how super tender and cute they are.
📮 Save this recipe for later!
There are a few components and steps to it, but don't start thinking "Arghh I knew it!" yet. Those are easy and simple steps. And if you're anything like me, you'd find the steps are very fun to do, just like in my classic panettone bread recipe!
Jump to:
Recipe Highlights
Taste and texture - Super tender chocolate cake rolled with buttery coffee cream cheese filling, covered with chocolate ganache. Yum!
Size - This recipe makes 4 yule logs but each log is cute and rich enough to share between 3 people. Or just 1, who's judging right?
Level - Easy with a few components and steps. You'll have some free time while waiting between each step to FaceTime your friends.
Occasion - Perfect for Christmas and the holidays, just like Marco's family's easy fruitcake which is so delicious!
Lets Talk Ingredients
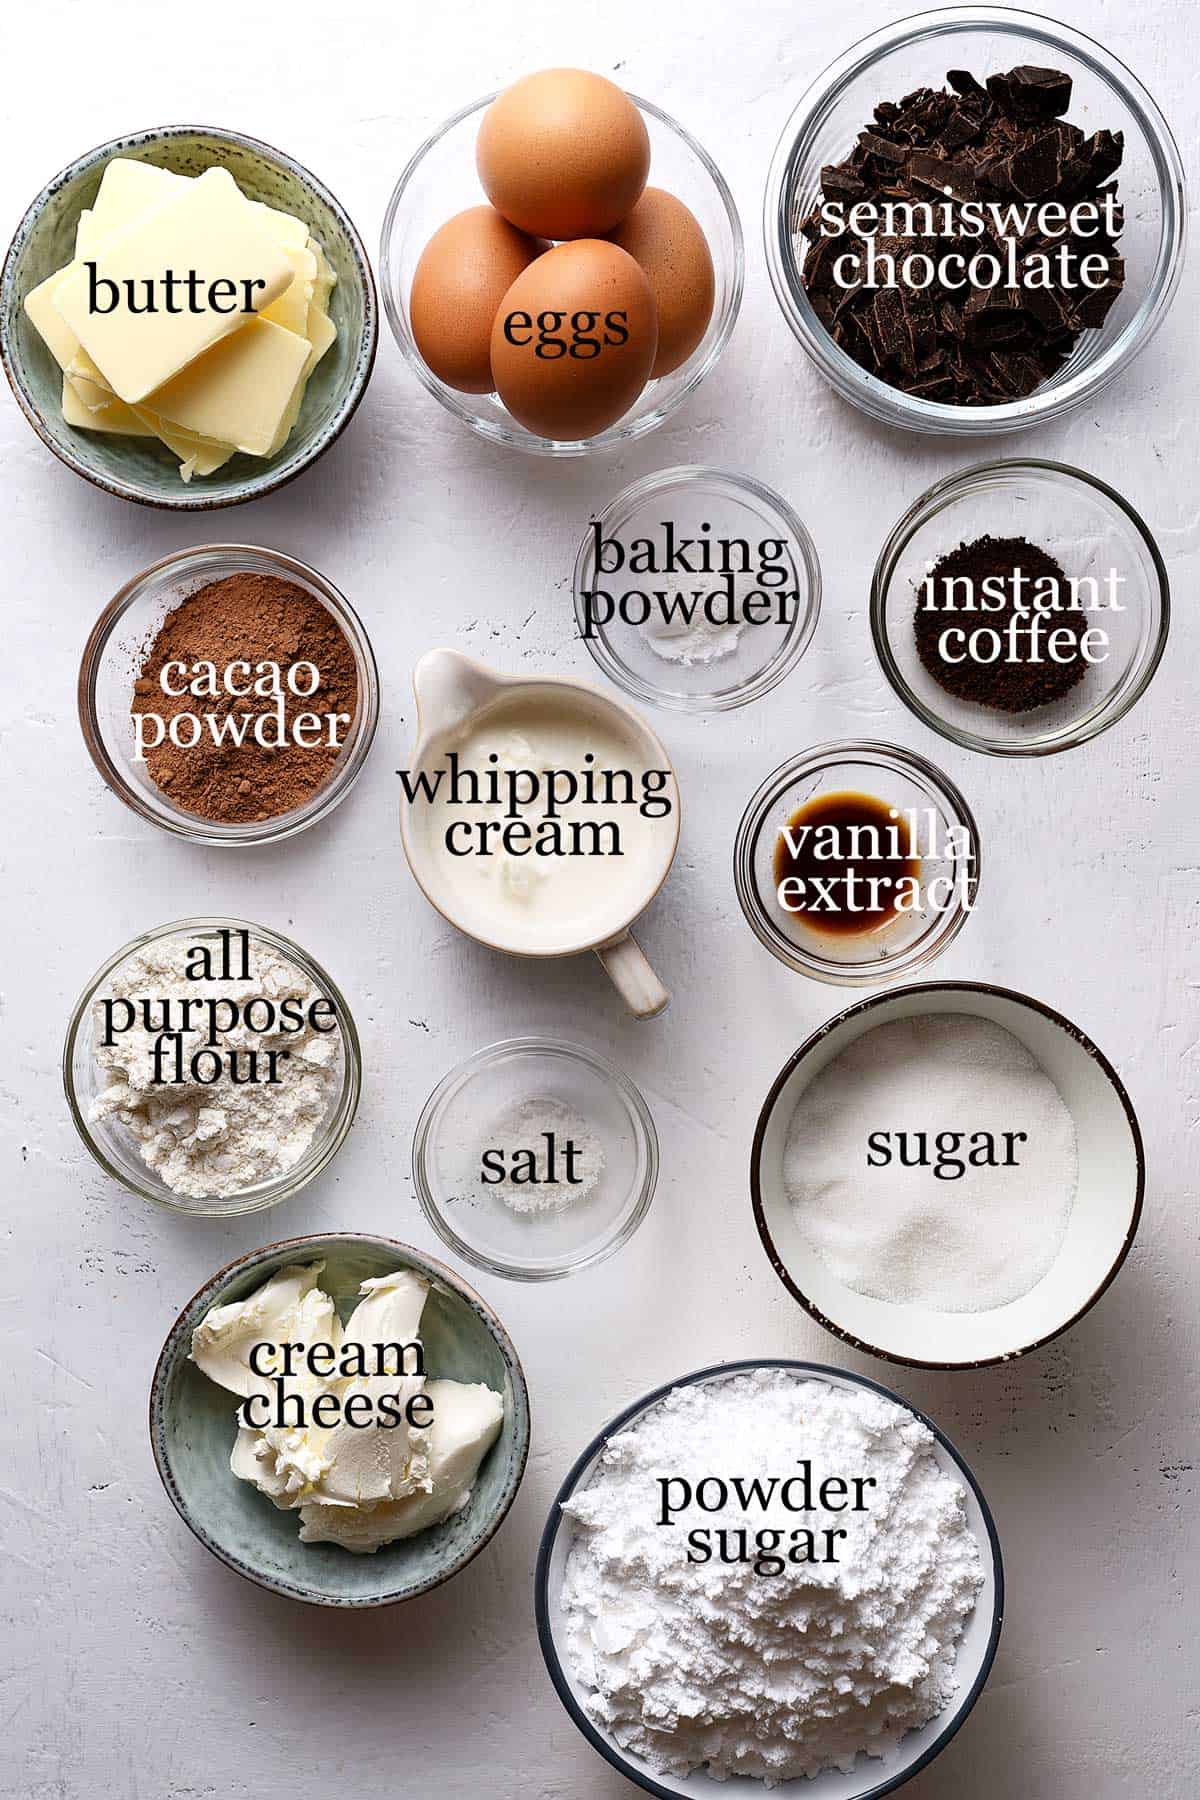
Cocoa powder - Use natural cocoa powder (lighter in color), not Dutch-processed (darker in color). If you use Dutch-processed cocoa powder, your cake will come out flat and dense. I know because that happened to me, 2 times during this recipe testing. So don't be like me.
Chocolate - I use semisweet 55%. You can, of course, use darker chocolate if you prefer. Remember to use baking chocolate, not the ones that you snack on.
Cream cheese - Use full fat to make sure the filling holds up.
Instant coffee - I use instant coffee to get that strong coffee flavor without adding too much liquid to the filling.
TIPS: If you don't have instant coffee, use 1 shot of espresso instead (1 liquid ounce or 30 ml). Your filling might be a tad runnier, so chill it longer in the fridge or add a bit more powdered sugar to firm it up.
Take Your Time
As I mentioned earlier, this is an easy recipe with several components and steps to it. So take your time.
You'll be chilling the filling, the ganache (if your kitchen is hot), and the cake after it's rolled, filled, and cut so you'll have some time here and there to just relax. Or binge-watching The Crown. Your choice.
The assembling part might get a bit messy and you might think this will never work but trust me, just follow through and you'll be surprised at how amazing and beautiful the outcome will be.
Hope you do give this recipe a try. Let me know what you think!
Make In Advance
Yep.
Prepare the cake, slice, fill, wrap, and chill it in the fridge 2 days earlier. Continue with the rest on the day of.
If your fridge can fit a bigger tray, then you can even proceed with coating and carving the chocolate ganache. Wrap your tray tightly with cling film and chill in the fridge.
On the day of, transfer to a serving plate and decorate. Just remember to take them out from the fridge for a minimum of 30 minutes before serving (bring to room temperature).
More Holiday Treats
- Easy cheesecake (Cheesecake Factory inspired)
- Double chocolate fudge cookies
- Caramel-stuffed apple cookies
- Speculoos cheesecake shots
- Rugelach
Recipe Video
📖 Recipe
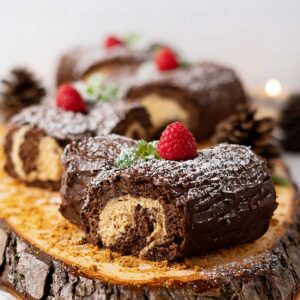
Mini Mocha Yule Log Cakes
Ingredients
Coffee Cream Cheese Filling
- ½ cup unsalted butter (110 g), softened
- 4 oz full fat cream cheese (110 g), room temperature
- 1 tablespoon instant coffee
- 1 teaspoon water
- 1 teaspoon vanilla extract
- 2 cup powdered sugar (240 g), sifted
The Chocolate Cake
Dry Ingredients
- ⅓ cup all purpose flour (45 g)
- ⅓ cup natural cocoa powder (25 g)
- 1 teaspoon baking powder
- ½ teaspoon salt
Wet Ingredients
- 4 large eggs , room temperature
- ½ cup granulated sugar (100 g)
- ¼ cup unsalted butter (60 g), melted
Chocolate Ganache
- ½ cup whipping cream min 35% (125 ml)
- 4 oz semisweet chocolate 55% (110 g), chopped into small pieces
Instructions
Coffee Cream Cheese Filling
- Add butter and cream cheese into a bowl and whisk for a few minutes until well combined and fluffy, using a handheld whisk. Set aside.
- Into another bowl, mix instant coffee, water and vanilla extract with a spoon until the coffee is fully dissolved. Now add into cream cheese mixture together with ⅓ of powdered sugar. Mix until everything is well combined before adding another ⅓ and finally the rest of powdered sugar. Chill in the fridge until later.
The Chocolate Cake
Dry Ingredients
- Sift all ingredients into a bowl and mix well using a spoon. Set aside.
Wet Ingredients
- Add eggs and sugar into a bowl. Whisk for 8-10 minutes at high speed until ribbon stage, using a handheld whisk.
- Now sift in dry ingredients 1 heap tablespoon and gently fold the mixture to mix everything, using a spatula. Continue until you finish with the dry ingredients. Lastly add in melted butter and give everything one last gentle fold to mix.
- Pour batter into a 10.5x15.5 inch (27x39 cm) baking tray that has been greased and lined. Lightly shake the pan to smooth out the batter. Bake in a preheated oven at 375ºF (190ºC), using upper and lower heat, on middle rack, conventional mode (no fan-assisted) for 10 minutes or until fully cooked. Don't over bake.
- Remove from the oven and leave for 3 minutes. Dust the top generously with powdered sugar. Place a kitchen cloth on top, followed by a cooling rack and gently yet swiftly flip the baking pan. Remove the pan and the lined parchment paper.
- Dust more powdered sugar on top. Now roll the cake together with the kitchen towel and leave to completely cool before using, around 30 minutes.
Chocolate Ganache
- Heat the cream in a pot until you see bubbles around the edges. Pour into a bowl containing the chopped chocolate. Leave for 30 seconds and then mix everything together using a hand whisk until you get a thick chocolate ganache. Leave to cool until it thickens enough to spoon (refer to video above), before using.
Assembling
Fill The Logs
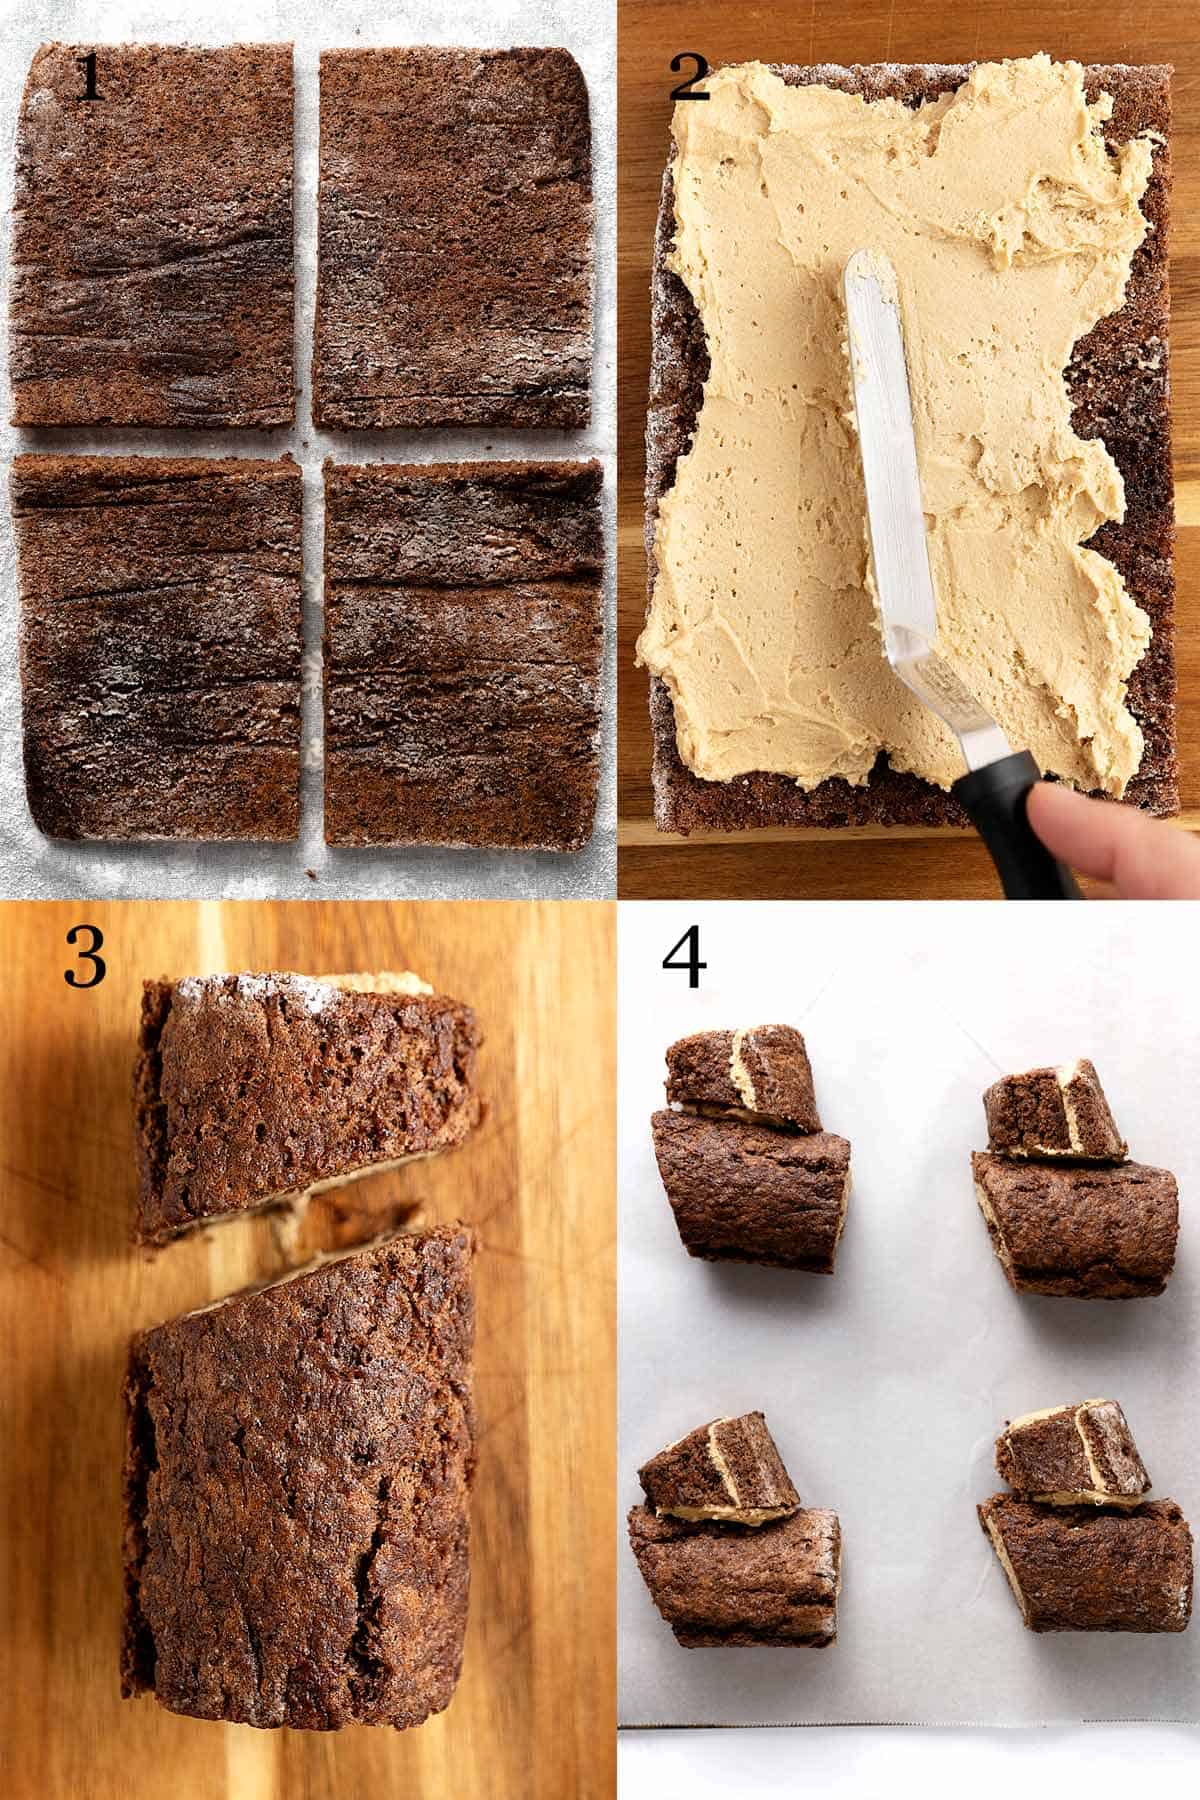
- Unroll the cake. Cut once lengthwise and cut each piece into 2, you'll have 4 rectangular pieces.
- Place 1 piece on a wooden table (dust it with powdered sugar first, if needed), short side facing you. Spoon small dollops of coffee cream cheese filling all over the cake surface. Spread evenly using an offset spatula. Be gentle as the cake is super tender, you don't want to tear it apart.
- Now spoon additional filling at the beginning of the cake, creating like a small log. Then gently yet swiftly roll the cake. Wrap tightly with cling film and place in the fridge for 30 minutes, while continuing with the rest. Leave some filling for later to act as glue.
Shape The Logs
- Take 1 log and remove the cling film. Slice diagonally at ⅓ length of the log. Place the bigger piece on a baking tray lined with parchment paper. Take the smaller piece and put some filling on the sliced side and press it against one side of the bigger piece, thus making the yule log shape. Continue with the rest.
Decorate The Logs
- Spoon the thickened ganache on the logs, making sure you coat every surface except the open parts. Chill in the fridge for 15 minutes or until the ganache is slightly firm.
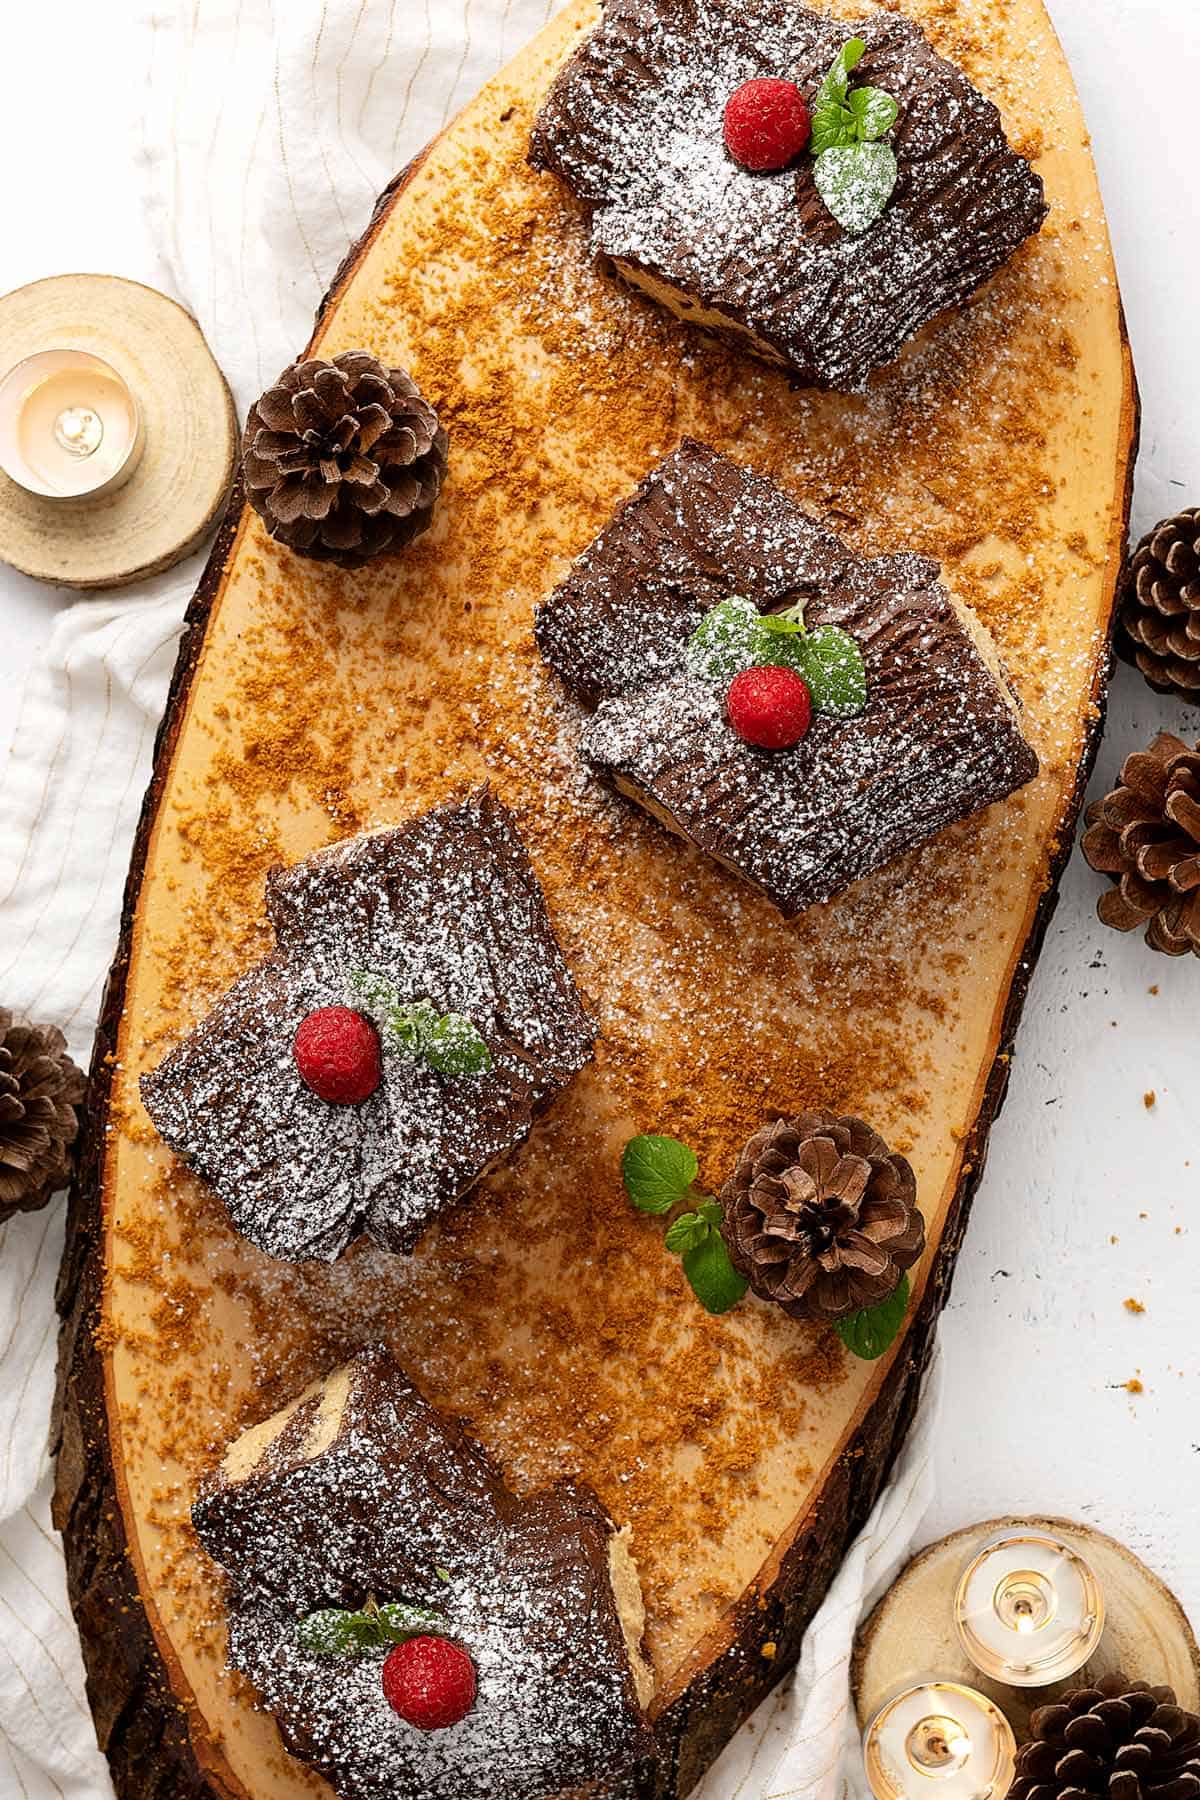
- Use the tip of a knife to lightly carve the ganache in lines, imitating the bark of a branch/trunk. Chill in the fridge for 30 minutes. Place the logs on a serving wooden table that has been sprinkled with ginger cookie crumbles. Use a thin wide spatula to move them easily. Decorate with some leaves, raspberries and dusts of powdered sugar. Serve!
Notes
- This recipe makes 4 mini logs, and each log can serve at least 3 people.
- Use spoon and level method when measuring (for cup measurement)
- Use a portable oven thermometer (like this one) for a more precise temperature reading (I use it too)
- Refer to my post above for ingredients notes and tips
Nutrition Facts
The nutrition facts provided are an estimate per serving. Accuracy is not guaranteed.








chris says
question about portions on this: the recipe says it makes twelve servings, but the video only shows 4 from the base recipe. Do I need to triple the recipe to get to the 12 servings indicated?
Bea & Marco says
Hi! No, no need. We find that 1 log is big enough to serve 3 people for dessert as it's decadent and rich. Hope it helps!
Lisa Lahmann says
Just made them for a work party and they turned out great! My first time making sponge cake and it could have been fluffier - but it rolled beautifully and was visually impressive. Will definitely do it again.
Bea says
That's awesome! Love to hear that, thanks for your feedback, Lisa!
Nicole L says
Great recipe. So darn cute too!
Bea says
Haha! Right? Thanks Nicole!
Yustrima says
This look amazing Bea. Can I freeze after decorating them?
Thanks in advance!
Bea says
Hi! Yes, you can (I do it 😂). No problem!
Nicole says
I made this for Christmas and WOW! My family loved how soft the cake was. Thank you for getting me loads of compliments that day. Lol!
Bea says
Haha! Well I'm happy to know that, thanks Nicole!
Lily says
I made it for Christmas! Tastes fab. Thank you and Merry Christmas!
Kathy says
This was so amazing. The cake was soft like you said. Thank you for the detailed instructions, beautiful video and the recipe!
Bea says
Yeay! Glad that you gave it a go and liked it. Thanks Kathy!