📮 Save this recipe for later!
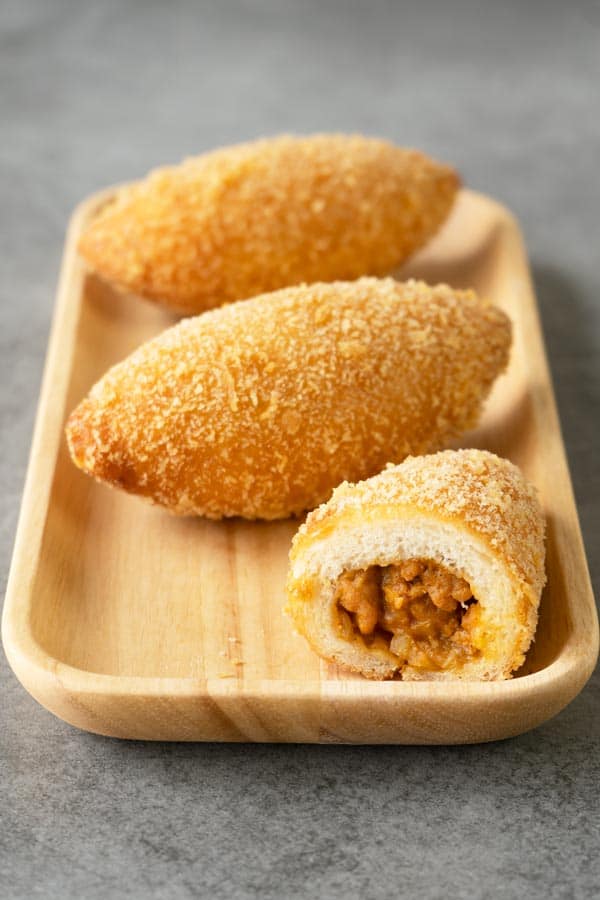
If you love to try new, unique and of course delicious food then you should really try these Japanese curry buns or カレーパン karē pan.
They are soft fluffy buns that have curry filling and then coated in panko breadcrumbs and finally deep fried to get that crispy crust.
Are you as excited as I am about this recipe?
Let's get started, shall we?
Homemade Panko
As I mentioned earlier, these buns are coated with panko breadcrumbs before they are fried.
That panko layer makes the buns really crispy and the look also is so unique and beautiful, don't you think?
In this recipe I'm using my homemade panko breadcrumbs as the last time that I really needed panko I couldn't find it anywhere in my city.
Homemade panko is super easy to make, very cheap and you can even make it using whole wheat bread.
Unique Shaped Buns
I don't know about you but I find the shape of the buns is so unique. It's even fun to make them.
You can watch in the video below on how to fill the dough and fold it into that unique shape.
Talking about folding, here are some tips that I find useful when making these buns (or any other filled buns):
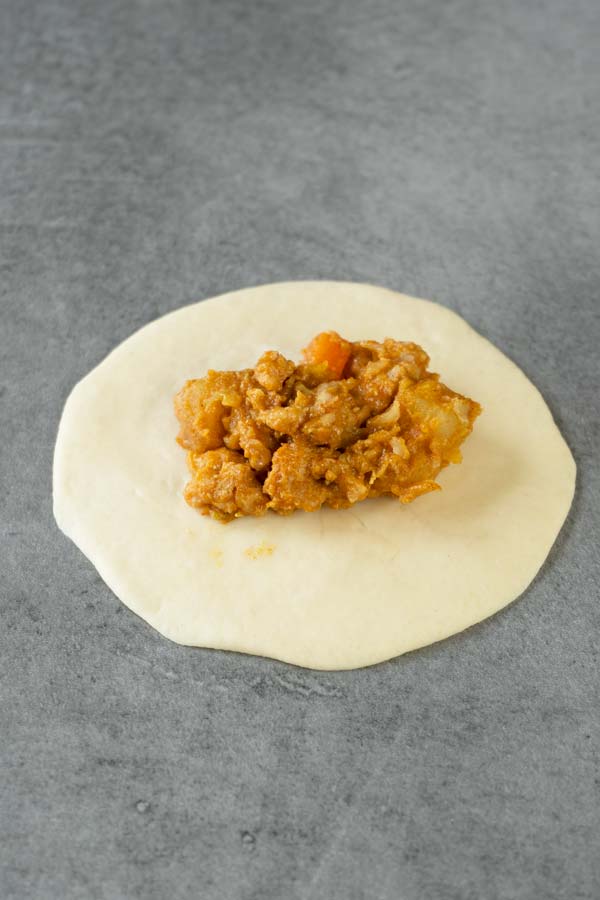
Dry filling - the filling should be moist but dry. Meaning we don't want it with any sauce. Dry filling will make it easier to assemble and prevent risking the sauce seeping out while frying.
Don't fill too much - Don't put too much filling on the dough that's going to be difficult to fold it together. Since it's a yeasted dough so the buns will puff up when we fry them and we don't want the filling to ooze out into the hot oil. Too messy.
Pinch tightly - Use some water to wet around the edges of the dough to help seal the dough better and remember to pinch tightly. Placing the buns seam side down also helps. Again, we don't want any filling coming out when we fry them.
Thinner edges - I find myself making a habit of rolling the dough thinner around the edges before I put in any filling. It's the same concept when making a homemade dumpling wrapper. This is to get an even thickness throughout after you fold the edges together. You can skip this if you don't mind though.
Hot oil on medium low heat - It takes around 5 minutes for the buns to get fully cooked and get that beautiful golden color. Maintaining the oil hot on this heat will prevent the buns getting burnt or risking raw dough.
Fried vs Baked
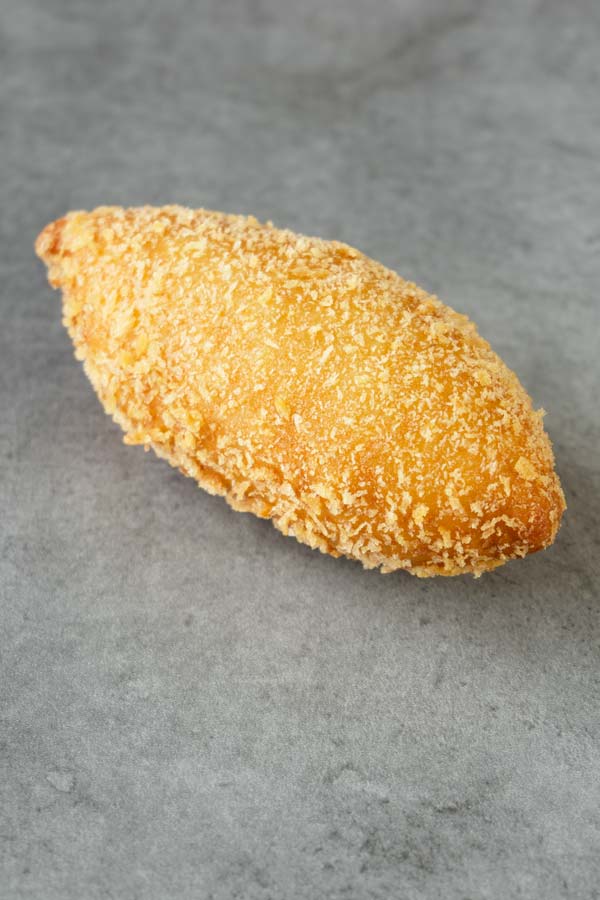
For this recipe I've tested both fried AND baked.
And guess what? They both worked amazing!
I just thought I'd share the fried version first as it's the traditional way of enjoying these delicious buns. Let me know if you want to see the baked version of these beauties.
I hope you'd give this recipe a try!
In Summary
These delicious Japanese curry buns are:
- crispy, soft and fluffy
- have mild curry taste for the filling, so if you're worry about spicy.. then don't
- made using homemade panko, yeay!
- so fun to make, and very easy
- simply DELICIOUS!!
Before You Go
Maybe you would also want to check out these recipes:
- How to make matcha bread
- Hokkaido cheese tart
- Japanese milk bread rolls
- Chicken and shrimp dumplings
Video
📖 Recipe

Japanese Curry Buns
Ingredients
The Filling
- ½ yellow onion , chopped
- ½ thumb sized ginger , grated
- 2 garlic cloves , grated
- 1 medium sized potato , cubed
- 1 carrot , cubed
- ½ cup water
- 7 oz minced turkey (200 g)
- 1 tablespoon ketchup
- 1 tablespoon soy sauce
- ½ apple , grated just before using to prevent from browning
Curry Slurry
- 2 tablespoon curry powder
- 1 tablespoon corn starch
- ¼ cup water (60 ml)
The Buns
- 3 cup bread flour (390 g)
- 1 teaspoon salt
- 2 tablespoon honey (40 g)
- 2 teaspoon instant yeast (6 g)
- 1 cup warm milk (250 ml)
- 2 tablespoon softened butter (30 g), in small pieces
Breading
- 2 eggs
- 1 ½ cup panko breadcrumbs (70 g)
Instructions
The Filling
- Prepare the curry slurry by adding all of its ingredients into a bowl and mix well. Set aside.
- Heat some oil in a pan and add in onion. Cook until translucent and then add in ginger and garlic. Continue until they are golden brown.
- Now add in potato, carrot, water and some salt. Cover the pan with a lid and leave for the potato to soften and fully cooked.
- There should not be liquid by now, if there's still some, continue cooking without the lid until it dries. We want no sauce. Now add in minced turkey and sprinkle some salt. Continue until the meat is fully cooked, breaking it into small pieces as you cook.
- Add in ketchup, soy sauce and grated apple. Mix everything well. Lastly add in curry slurry, mix everything together and continue cooking until the curry thickens. Cool completely before using.
The Buns
- Add all of the buns ingredients, except butter, into your stand mixer bowl, mix to incorporate and then knead for 10 minutes. Lower the speed and start adding the butter one piece at a time.
- After that continue to knead for 5 minutes at normal speed. Form the dough into a ball and place in a greased bowl. Cover bowl tightly with cling film and leave dough to rise until double its size.
Assembling
- Prepare your breading stations. Whisk eggs in a plate. In another plate pour in panko breadcrumbs. Set both aside.
- Place risen dough on a working surface and lightly shape it into a log. Cut it into 16 equal pieces and form each piece into a ball. Cover with cling film to prevent them from drying.
- Take a ball and flatten it a bit. Roll it into 3.5 inch (9 cm) circe. Now roll ⅓ into the center and keep on turning the dough as you roll. This will leave you a circle with thinner edges.
- Scoop some filling to the center of the circle. Wet the edges with some water and then fold and pinch the seams together tightly. Now pinch and fold the seams again.
- Now let's use our breading station. Put the bun in eggs and cover it well. Then place in panko breadcrumbs and coat it all over. Place it on a baking tray with baking sheet. Continue with the rest.
- Cover with cling film and leave for 30 minutes or until they puff up a bit.
Frying
- Heat abundance of oil in a pot on medium low heat. Carefully put the bun inside and immediately roll it in the oil for even cooking. Fry for 5 minutes or until fully cooked.
- Remove from the oil and place on a kitchen paper to absorb the oil. Continue with the rest.
How To Serve
- Best served fresh and warm (hot if you can take the heat) to really enjoy these delicious beauties.
How To Store
- Store in airtight container at room temperature for 1 day. Then I would recommend you keeping them in the fridge.
- Reheat in the oven at 400ºF (200ºC) for a few minutes to bring them back to life.
Nutrition Facts
The nutrition facts provided are an estimate per serving. Accuracy is not guaranteed.



Daren says
I saw these buns when my son urged me to watch an anime. So I googled them and discovered your site.
My real curiosity is...which type of oil do you recommend? The oil must play a role in the flavour?
Bea & Marco says
Hi! For frying, it's best to use higher smoke point oil and with the least flavor. Canola and vegetable oil are good for this. Hope it helps!
Nizam Khan says
VERY WELL PRESENTED THAT TICKLES ALL OF OUR SENSES AND SPECIALLY OUR TASTE BUD..
Bea says
I'm very pleased to hear that, thanks Nizam!
Elveana says
Hi..could you do the baked version?also can this use breadmaker?
Bea says
Hi! Yes, will try to make the bake version also. I don't have a bread maker so I'm not familiar with how it works/needs, sorry though!
EJ says
Hello! Great recipe, I’d like to try it but I don’t want to fry it. Is the baked version out yet?
Bea says
Hi! Unfortunately I still haven't publish the baked version yet. Sorry! Will try as soon as I can 😊.
Sam says
What temperature is the oil when frying the buns?
Bea says
The same like donuts, around 360-375ºF.
Yamaan says
Looks great! I plan on making these but I can't tolerate ketchup, is there a need for it? Also, do you have nutrition facts on these? Like calories and stuff
Jou says
What can I substitute for the bread flour?
Sally Reardon says
Hi Bea
If bake, what temperature oven to be set and for how long to bake please?
Sally
Bea says
That's great, thanks Dave!
Reid says
Bea these Japanese curry breads are delicious! Only one bread opened a small hole when I was frying LOL! Never tried them before in my life!! Thank you for sharing with us. Just so you know,I made the focaccia again two weeks ago and it came out great!
Bea says
Hey Reid, so you made the focaccia again! That's great! Yes with these buns, the pinching/sealing part is crucial (it happened to me too, so no worries 😀 ). Thank you so much!
Karly says
These look so delicious! Thanks for sharing.
Bea says
Thanks Karly!