What Are They?
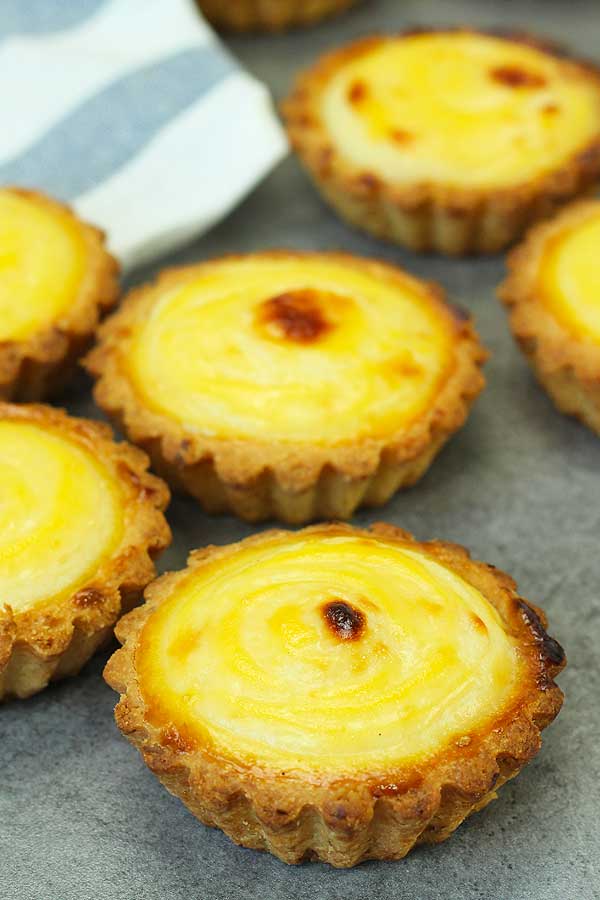
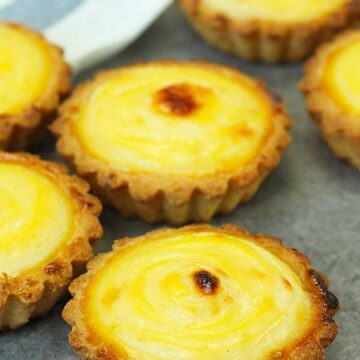
It's a cheese tart that's been so popular throughout Asia. Originally inspired by Hokkaido's dairy products and originated in a bakery in Sapporo, Hokkaido.
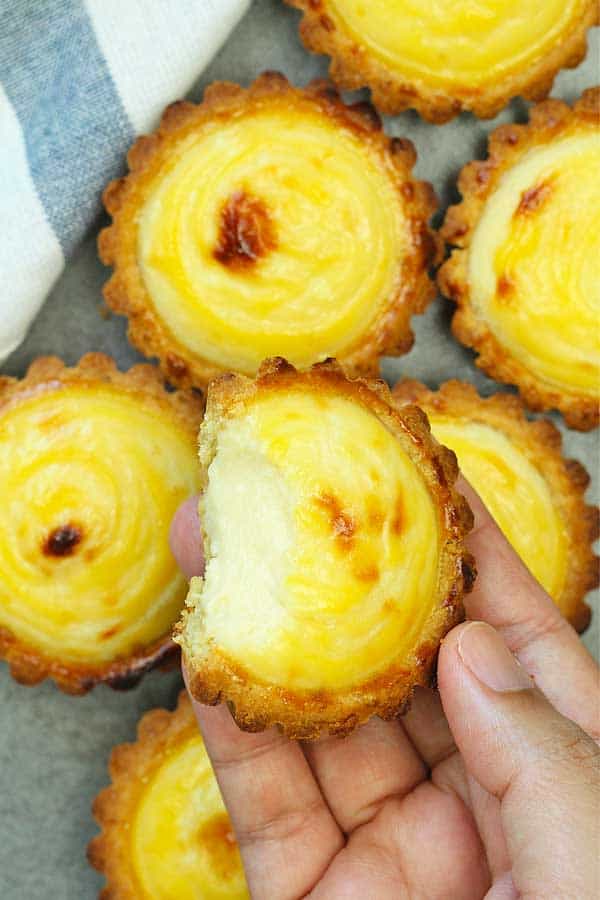
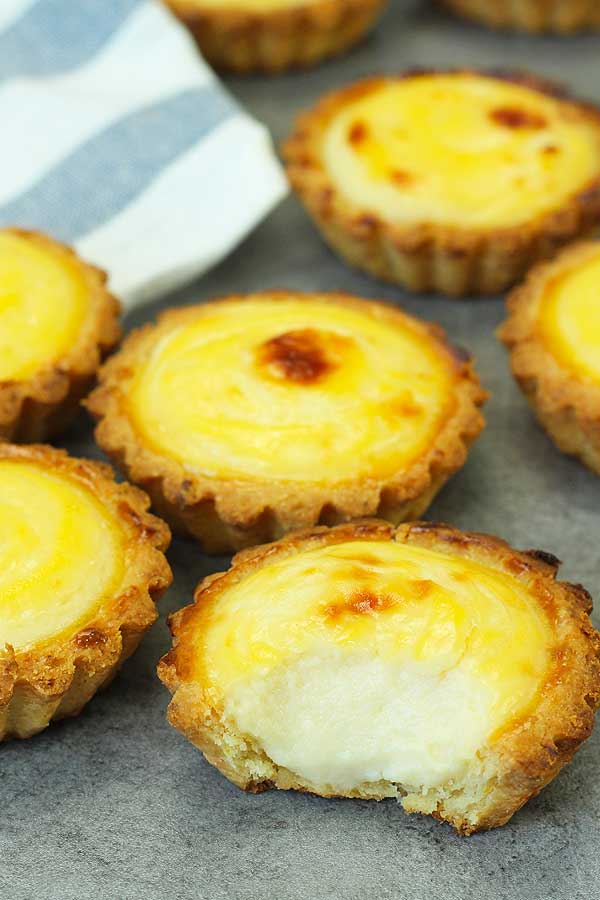
They are really something not to miss out. The tart crust is flaky and the cheesy filling is creamy.
Making These Tarts in Spain
Yes. I've never been to Hokkaido or Japan myself. I would love to, one day. So obviously I'm not using Hokkaido's dairy products nor the original bakery's recipe. This is my take on the ohhh-so-famous-and-yummy Hokkaido cheese tarts.
Save This Recipe!
I first heard of the tarts like 2 years ago from my sister. She sent me a photo of the Hokkaido cheese tarts that she bought in Malaysia. She was raving on how delicious they were and I thought ok, that cannot be. I simply have to taste it. That means recreating it.
So today I'm sharing my take on it with you.
I'm using local dairy products from Spain. Actually all of the ingredients are from Spain. My point is, you can still enjoy these delicious tarts wherever you are. I'm so passionate about limitless cooking. Cooking should not be bound to certain places and ingredients. It should carry the same freedom as life does, and adaptable to where we are. That's the beauty of cooking.
Tips
This recipe is simple even though you have the crust and the filling components to tackle. I'm adding lemon zest in the crust as it just brings the taste to another level. Just a note though. Where I am now is super hot in the summer.
So that's why I'm chilling the dough for a while so that it's firm enough to handle before pressing it into the tart moulds. If you don't have that problem, by all means skip the chilling process.
I do say to place the unbaked crust in the freezer for a while though. With this type of crust it's always good to have it cold before baking. More when we've been manipulating the dough a lot when pressing into the moulds.
After piping the filling into the baked shells, put them in the freezer until the filling is firm enough to the touch. Why? Because we will be brushing the top with some egg yolk and it's going to be too soft to directly brush on it without putting in the freezer for a while.
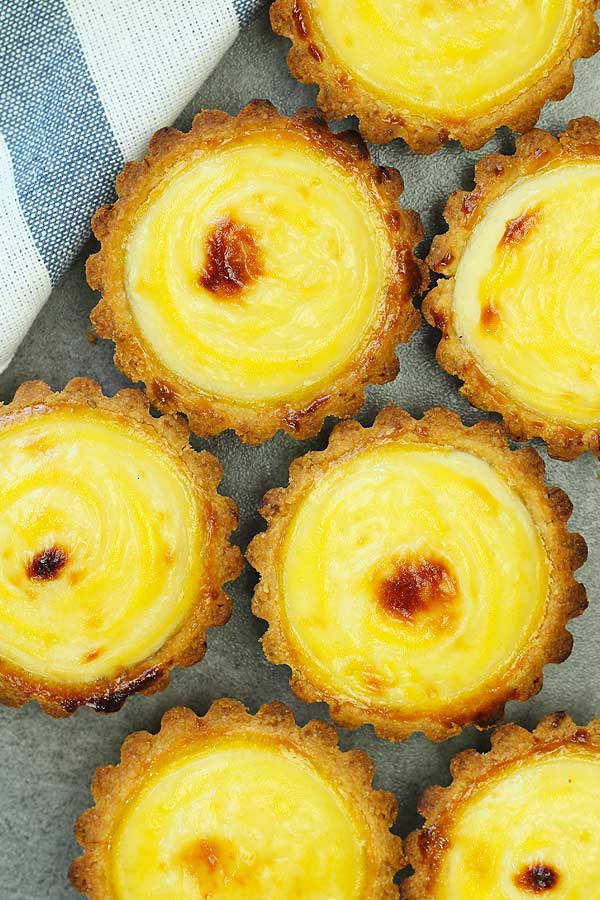
The filling is pre cooked as a custard before we grill it. So it won't take long. Just enough to get that beautiful slight charred looks.
So I know what I would be serving my sisters when they come to visit. And if they don't put it in writing that my Hokkaido cheese tarts are the best in the world (muahaha!) then they might be spending the night in the roundabout across the street. Ha!
More Tart Recipes
- Mini salted chocolate tarts
- Hong Kong style coconut tarts
- Coconut and dulce de leche tart
- Peanut butter cheesecake tarts
Recipe Video
📖 Recipe
Hokkaido Cheese Tart
Equipment
- 16" Disposable Decorating Bag Set
Ingredients
The Shells
- ⅓ cup unsalted butter (75 g), soften
- 2 tablespoon granulated sugar (25 g)
- 1 egg yolk , room temperature
- ½ teaspoon vanilla extract
- Zest of 1 lemon
- 1 cup all purpose flour (130 g)
The Filling
- 3.5 oz cream cheese (100 g)
- 3.5 oz mascarpone cheese (100 g)
- 1 oz Parmesan cheese (30 g), grated
- 2 tablespoon unsalted butter (30 g)
- ⅓ cup milk (80 ml)
- ¼ cup icing sugar (30 g), sifted
- 1 tablespoon corn starch , sifted
- ½ teaspoon vanilla extract
- 1 tablespoon lemon juice
- 1 egg , lightly beaten
- 1 egg yolk , to brush to top
Instructions
The Shells
- Add butter and sugar into a bowl and mix them well using a spatula. Then add in egg yolk, vanilla extract and lemon zest. Mix well to combine.
- Finally add in flour and mix just to combine. Don't over mix. Place the dough on a cling film and wrap it. Then place it in the fridge for 1 hour. Meanwhile let's make the filling.
The Filling
- Use a thick base pot and place it on medium heat. Add in the 3 cheeses together with milk and butter. Cook until the cheeses are melted.
- Then add in icing sugar, corn starch and mix until smooth. Finally add in egg, vanilla extract and lemon juice. Continue cooking until the mixture thickens. Sift into a bowl to discard any lumps. Cover the bowl with the cling film touching the top surface of the filling and set aside to cool completely.
Assembling
- Remove the dough from the fridge after 1 hour. Take some of the dough and press it evenly inside a 2.5 inch (6.5 cm) tart mould. Cut off the excess dough with a knife and prick the base with a fork. Repeat until the rest of the dough is finished.Tip: Place the unbaked shell in a freezer for 10 minutes to firm up a bit.
- Bake in a preheated oven on the lowest rack at 340ºF (170ºC) for 15 minutes. Cool completely and then remove the shells from the moulds. Tap the bottom a few times to help releasing it.
- Fill the filling in a piping bag and pipe in inside the shells. Then place the unbaked tarts in the freezer for 30 minutes for the filling to firm up. Then brush the top of the filling with some egg yolk wash.
- Grill for a few minutes in the oven until the top is slightly charred. Enjoy!
Nutrition Facts
The nutrition facts provided are an estimate per serving. Accuracy is not guaranteed.





Sammi says
Hi Bea
Thanks for sharing.
I want to know:
1/ How long the unbaked tart could be freeze? Could it be up to 2 weeks or longer?
2/ can I use the toaster oven to bake the tart too?
Thanks.
Sammi
Bea says
Hi Sammi! Yes I would say they would last more or less 2 weeks. I don't have a toaster oven and haven't tested using it so I can't really say. Sorry!
Ryan says
Hi,
What are your thoughts on using pre-made tart shells for this recipe? I.e the one you can buy from the frozen ailse on the grocery? Im thinking would save time and just make the custard! : )
Bea says
Hi Ryan! I would really recommend you to try making the shells to really enjoy and appreciate the cheese tart 🙂
Dana says
This recipe is so delicious! It really reminded me of Tokyo Station’s BAKE!
I’ve tries making it four times it turned out really good expect the consistency of the filling. I’ve been having troubles making it thicker. Sometimes I used corn flour instead of cornstarch and cooking it more than 10 minutes. The result was very liquid like and had rice sized clumps. The only time the consistency was okay when I accidentally burnt the filling a bit (Still turned out great!! But smelled like grilled cheese sandwich a bit and wasn’t smooth).
So, any tips to make the filling thicker? Do I need to add more cornstarch?
Thanks! 🙂
Dana
ELLA says
Hi Bea, can I skip the pre-baking procedure of the shell? Is it possible to bake both the shell and the filling without having pre baking the shells.
Thanks for your reply
Bea says
Hi Ella. Nope, you'll need to bake the shells first since the cooked filling won't take long in the oven. Hope it helps 🙂
Noël says
This recipe is amazing!!! Thank you so much for making my family, boyfriend, friends, and coworkers tummies quite happy!! I just wanted to note that at first the cheese mixture, though quite delicious, was definitely rich and I wanted to balance out the flavors a bit and add that special something SO I put a little nutmeg and cinnamon into the mixture. It turned out perfectly! Also the addition of the lemon zest to the tart shells were superb. What a lovely recipe! Thank you!
Bea says
Nutmeg and cinnamon sounds yum! I'm happy to know that everybody loved it, thank you so much Noel!
Ann Chuah says
Look yummy
Bea says
Thanks Ann!
Susan says
Am I able to get a recipe for the Hokkaido STRAWBERRY tarts - they are absolutely incredible. I buy heaps when I’m in Brisbane, but it’s a 3 hour drive and I would love to have a go at making some. Bless you
Susan
Luca says
You could probably substitute the vanilla extract with strawberry extract to make sure that the balance between wet and dry ingredients stays and you have strawberry flavor.
Melanie Hart says
I love the combination of cheeses that you put, brilliant!
Parmesan in a sweet dessert, I would have never thought it would be so incredible. Thank you for this.
Bea says
Right? Parmesan is sweet dessert is just delicious! Thank you so much Melanie!
Radhika says
Hi Bea! I tried the Baked cheese tarts at Tokyo station recently and loved them! Your recipe looks amazing. I would love to try it but have a question. Can the shell be made thinner or will it break apart if I try to do so?
Bea says
Hi Radhika! Well you can try making the shells thinner but not so much though because they're flaky. Let me know how it goes for you. Thank you!
C says
Hi Bea, apologies for this question. I have all the ingredients here except for mascarpone and parmesan cheese. My cheese are only cream cheese and cheddar, do you think I could use these 2 cheese for this recipe? If yes, by how much? Thanks in advance.
Bea says
Hi! No need for an apology, we're all here to share and learn 🙂 . You can use the same amount of mascarpone for the cream cheese. And use the same amount of parmesan for the cheddar. The taste won't exactly be the same though but it would work. Hope it helps.
C says
Thanks a lot. 🙂
Isabelbakes says
Hi! I just had some for the first time yesterday from a Japanese bakery. And I plan to bake some. My question is do you need to grease the tart rins? Also, we don't have mascarpone readily available. Can I use Creamcheese?
Bea says
Hi! I don't grease the tart moulds since they never stick in mines. And yes, use cream cheese with no problem. Hope it helps 🙂
Excelsior Crocker says
Hi, I have a question about the tart. After filled the tart with filling do you have to bake the filled tart? Or just filled and freez since the cheeses was cooked already?
Bea says
Hi! Baking the tarts is to get that charred marks on top, making them look more beautiful. If you don't want to, then skip the freezing part because freezing is to make the filling harden a bit, easier to paint with egg wash before baking. Hope it helps 🙂
eileen chin says
this was quite a work for me but it was worth it. lol. very flaky pastry. I also love that the cheese is not that sweet. thank you for sharing. god bless.
Bea says
Haha! Good to know that it was worth it 😀 Yes the cheese filling is not so sweet, which for me is just perfect. Thank you Eileen!
Deb says
Amazing tarts! They were a hit in our office Christmas pot luck the other day.
Thank you for sharing, I love your recipes!
Bea says
Hi Deb, I'm excited to hear that you made them for your Christmas pot luck and everybody loved them 😀 Thank you so much Deb!
Dordy Bubb says
They truly sound amazing. This is one recipe I will give ago on making.
Thank you for sharing.
I'm waiting on my new home to be finished.
When I get my new kitchen this is what I shall bake.
Bea says
Congrats on your new home! That's exciting I bet :). And yes, the tarts are amazing if I can say so :D. Easy to make also. Hope you'll like them. Thank you Dordy!
Karenina says
When baking the filled tarts, is the temperature set at 170C ?
El Mundo Eats says
Hi Karenina! Yes the temperature is 170ºC for baking the tarts. Oven temperature varies so bake them until golden brown and fully cooked. Hope this helps 🙂