Argentine Classic
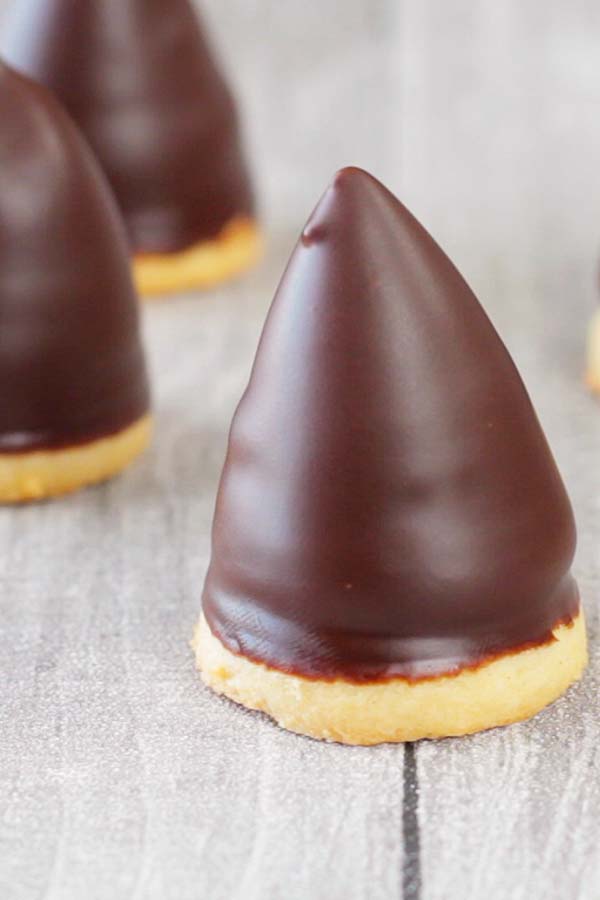
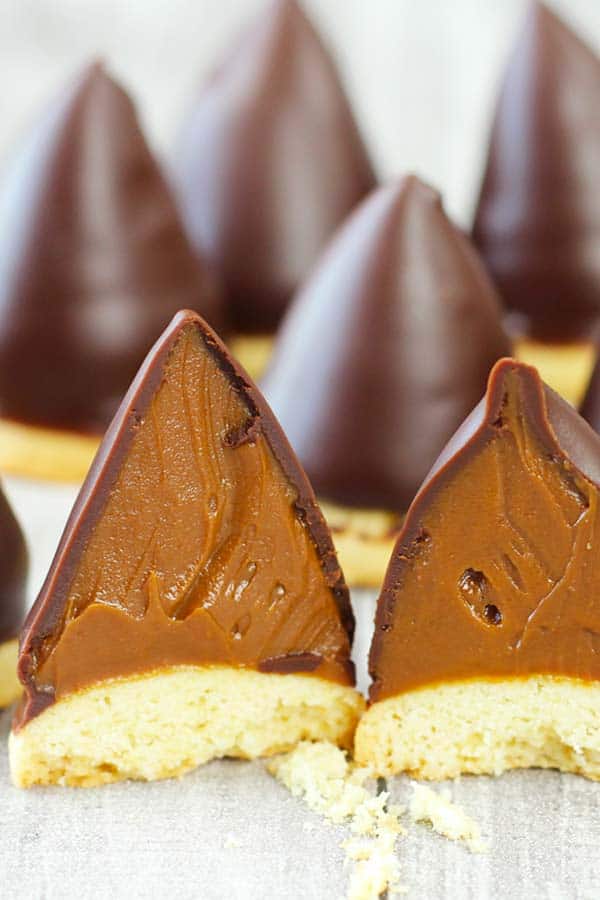
Yes. This is one of the Argentine classics that surely hit the right spot if you're a fan of dulce de leche. It's a cookie with some dulce de leche on top and then coated with chocolate. If you haven't heard of dulce de leche before, maybe you would want to read my post on how to make dulce de leche at home.
My husband and his entire family are huge fans of dulce de leche. As expected, of course. In Argentina this sweet treat is called conitos de dulce de leche. It means little cones of dulce de leche. My husband always tell the stories of when he was growing up they sometimes bought and had these cones as a treat.
It's not like that here in Spain. Since living here, he said they haven't seen any place selling these cones. Maybe because that type of sweets is foreign here. It's like if I was expecting my Asian turnover peanut pancakes to be sold here. Right?
Me being me, of course I just need to recreate the cones at home. Why not?
Personally for me, there's a feel of satisfaction when I can prepare a homemade version of a dish that brings any of us closer to our home countries. And usually the homemade version will end up being tastier than store bought ones.
It's the same with this recipe. Apart from bringing back the memories, my husband's family and he himself said that these cones taste so much better. That just bursts my heart with happiness.
These cones recipe doesn't really take so much ingredients, really. I guess the fact that they're homemade only, using good and fresh ingredients.. elevate the taste and quality.
📮 Save this recipe for later!
The Cookies
Usually the cookies are just normal cookies with no flavours to them. I thought why not change it a bit. I incorporated almond meal in the cookie dough for that wonderful nutty flavour. Honestly, the cookies are just great to eat by themselves like that. That's how flavourful they are.
The ingredients needed for the cookie dough are very simple. Icing sugar, butter, an egg, all purpose flour, almond meal, baking powder and baking soda. Simple, right? Though they're simple, I do like to measure all my ingredients before I start. This way I don't waste time looking for cups and spoons while in the middle of cooking.
Not that it's complicated to make it, but when you're mixing in the flour and almond meal, try not to over mix. This will prevent the cookies turning out hard. We want them to be crispy, not hard like stones. As I showed in the video, I put the dough in the freezer for it to get firm before continuing.
This is important also, more if you're living in a hot area. We want the dough to be quite firm when we work with it. Flattening the dough before putting it in the freezer not only helps making the firming process quicker, it also helps when we roll it out. It's so much easier to roll out a flatten dough than a ball of firm dough. Right?
What I recommend is, putting them in a baking tray with baking sheet. After filling up a tray, put that tray directly in the fridge before continuing with the rest of the dough. This will ensure the cut out cookies remain cold. No need to put them in the freezer, only in the fridge would be fine.
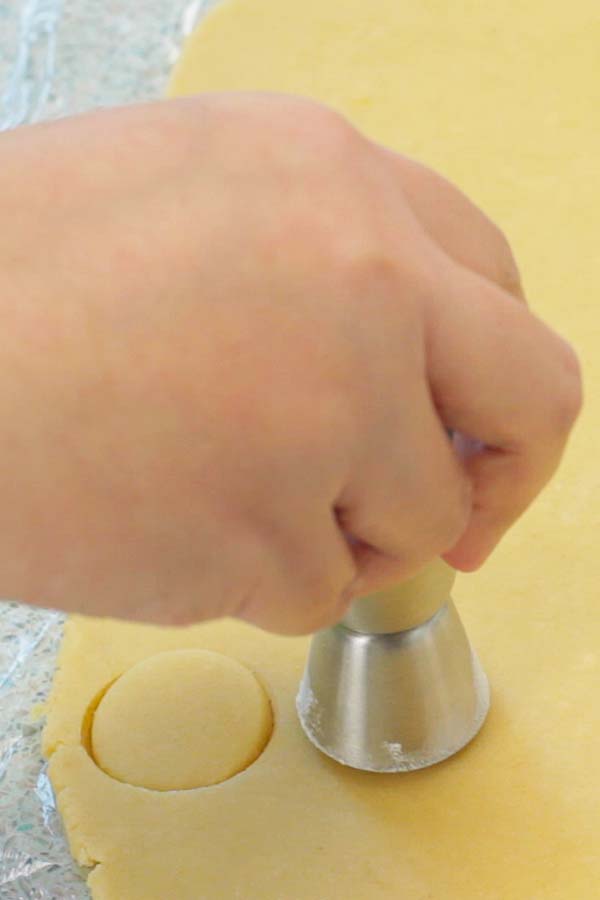
Talking about cutting out the cookies. For this recipe I cut out a 1 ½ inch (3.5 cm) cookies. I don't have a cookie cutter with that size so I just used the small side of a double jigger. What I would advise is, don't make the cookies that huge. Why? Because then it would be difficult to pipe the dulce de leche on top of them beautifully.
I've made the cookies bigger before, like around 2 inches (4-5 cm) and I didn't like how they turned out, visually. They tasted amazing but you have to admit, the looks also matter. I find that 1 to 1 ½ inch (3-3.5 cm) is the perfect size for these cones. Since they're small sized cookies, this recipe yields around 98 of them. Yes.
But fear not. If you don't want to use them all, simply freeze them, not baked. I did. I simply arrange them on a baking tray with baking sheet, close to each other but without touching. Then I put them in the freezer for a few hours until they're totally frozen. Once frozen, I put them in a ziplock bag and keep in the freezer. Easy.
Ok back to making the cookies. So after cutting out the cookies, you bake them. They don't need much time in the oven since they're not big. Just keep an eye at the bottom edges. Once they turn golden brown then the cookies are done. Cool them completely on a rack before using. Try not to snack on them.
The Dulce De Leche
Not everybody has the convenience of having dulce de leche at their place. If you're interested in this recipe and have no idea on where and how to get dulce de leche, maybe you would want to try to make it yourself.
The homemade dulce de leche also has the right consistency needed for these cones because it's firmer. I used bakery's dulce de leche, it has the same firm texture.
Yes you would need a firm consistency of dulce de leche for this recipe, not the thin runny one that you use to spread on a toast or something. Why? Because since we are going to pipe it on top of the cookies, so it needs to be able to hold it's shape.
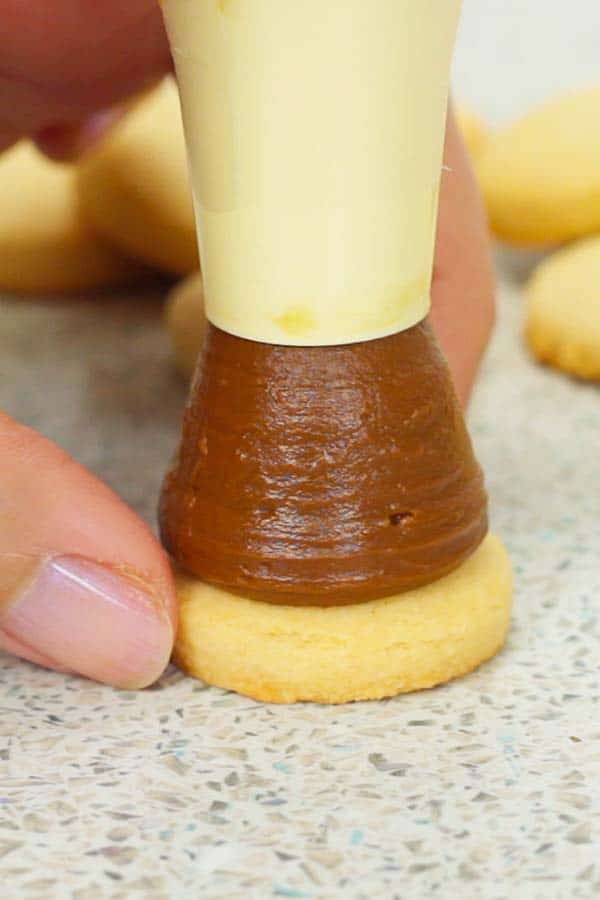
Piping the dulce de leche is the most fun part in this recipe, in my opinion. What you'll need is a piping bag and a round nozzle that's quite huge. I used a round nozzle of ¾ inch (2 cm).
If you don't have any, just cut off the tip of your piping bag. So when you want to start piping, there's a few tricks to it. This is how I do it. I place the nozzle close to the cookie, without touching it.
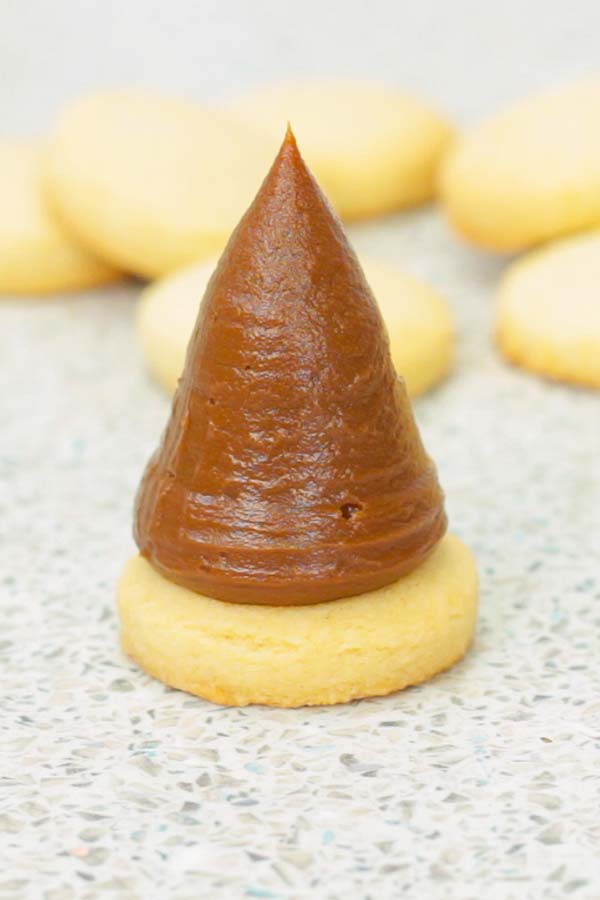
Then I start pressing the dulce de leche, without moving my nozzle, until the dulce de leche kind of covers the cookie. Then I slowly rise my nozzle, while still piping and when I get to the height that I want, I stop pressing and simply slowly pull the nozzle away. That will leave a perfect cone shape of dulce de leche.
The amount of dulce de leche needed for this is kind of subjective. It depends on how much you put on each cookie, and how many cookies you are going to use. For me, the way that I did it, it was around 1 tablespoon (15 g) of dulce de leche for each cookie and I used 25 cookies.
So more or less I used 1 ¼ cup (375 g) of dulce de leche. So depending on you, you might need more or less.
After piping the dulce de leche, I arranged the cookies on a baking tray with a baking sheet and put them in the freezer for around 20 minutes. Just to further firm up the dulce de leche so that it would be easier to coat with chocolate later.
The Chocolate
I used semisweet chocolate bar with 55% cocoa in this recipe. I like the chocolate coating to be soft enough that when you bite into it, the texture kind of blends with the texture of dulce de leche.
You don't want it to be hard that it breaks and fall apart when you bite into it. So having that in mind, I added some butter with my chocolate to soften it a bit. Butter also gives the beautiful shinny looks to the chocolate.
I like to melt my chocolate in a microwave, it's easier for me. You can of course use a double boiler if you want. As long as the chocolate and butter are melted, it doesn't matter how. So once they're melted and looking luscious, I poured the chocolate mixture into a tall and not so wide container, a glass in my case.
It's easier to dip without having to use so much chocolate if I were to use a wide bowl, for example. The ratio of chocolate to butter that I used is 2:1. And I used around 5.3 oz (150 g) of chocolate and 5 tablespoon (75 g) of butter to coat my 25 cones. So if you want to coat more, use more chocolate. Just remember and follow the ratio.
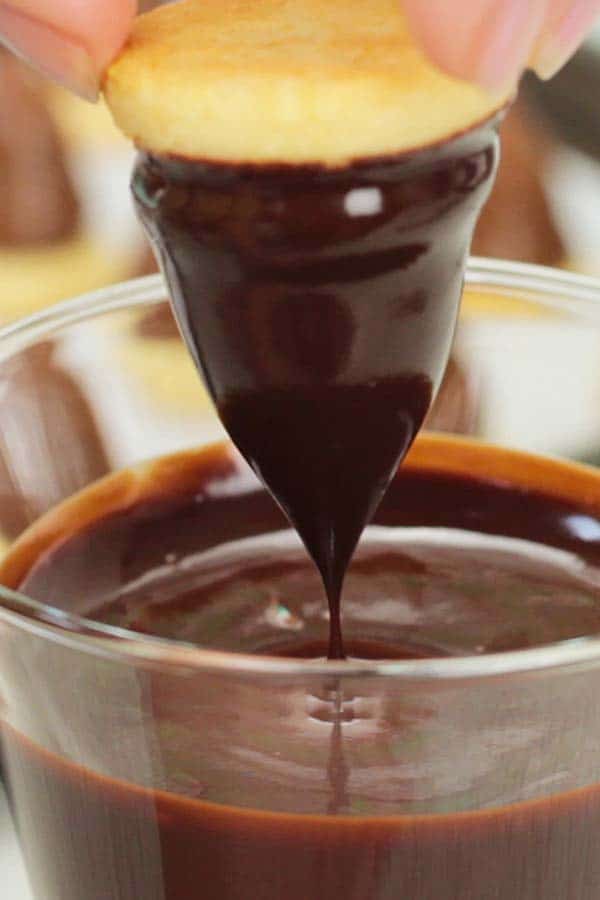
I think there's no need to explain how to dip and coat the dulce de leche in the chocolate. You simply dip and coat it. Some people like to dip until the whole cookie is coated with chocolate. I don't.
I like the contrast of color that the cookies give and for me, I feel it's enough chocolate coating the dulce de leche. No need for more. As much tempted as you feel to directly bite into the cones once you dipped them, don't. Let the chocolate set. Trust me.
These little gems are really to die for. They're wonderful to look at and amazingly delicious to eat. I hope you give them a try, do let me know if you like them. Enjoy!
More Recipes with Dulce de Leche
Recipe Video
📖 Recipe

Dulce de Leche Cones
Ingredients
The cookies (yields 98 cookies)
- 1 ⅓ cup all purpose flour (173 gr)
- 1 teaspoon baking powder
- 1 teaspoon baking soda
- ⅔ cup icing sugar (80 gr), sifted
- ½ cup unsalted butter (113 gr)
- 1 egg , room temperature
- 1 ¾ cup almond meal (175 gr)
The cones (for 25 cones)
- 5.3 oz semisweet chocolate (150 gr), chopped into small chunks
- 5 tablespoon unsalted butter (75 gr)
- 1 ¼ cup bakers dulce de leche (375 gr)
Instructions
The cookies
- In a bowl, add in flour, baking powder and baking soda. Sift and set aside.
- In another bow, add in sifted icing sugar and butter. Whisk until the mixture is soft and creamy. Add in egg and whisk everything until well combined.
- Add in previously sifted flour mixture and almond meal. Using a spatula, mix until everything is just combined. Don't over mix to avoid hard, dense cookies. Using your hand, bring everything together and form into a ball.
- Place the dough ball on a cling film and wrap it. Press and flatten the dough until it's around 0.5 inch (1.3 cm) thick, more or less. Put it in the freezer for 30 minutes or until it's firm. Flattening the dough will help it getting firm faster and also make it easier to roll it later.
- After 30 minutes, place the firm dough on a cling film and cover it with another. Roll it until it's 0.2 inch (5 mm) thick. Remove the top cling film. Cut out circles using a 1.4 inch (3.5 cm) round cutter. Flour it beforehand to avoid it sticking to the dough. Place the cut out cookies on a baking tray with a baking sheet. Note: Place the baking tray containing the cut out cookies in the fridge if you're not going to bake them immediately. This is to keep them cold and they bake better.
- Bake in a preheated oven at 340ºF (170ºC) for 8 minutes or until the bottom edges are golden brown and they're fully cooked. Cool completely on a rack before using.
Assembling
- Place some bakers dulce de leche in a piping bag with a round nozzle of ¾ inch (2 cm). Place the nozzle on top of a cookie but without touching it, slowly pipe the dulce de leche until it covers the cookie. Then slowly lift up the nozzle while still pressing. When you get to the height that you want, stop piping and slowly lift the nozzle up until a cone shape of dulce de leche is left on top of the cookie. You can watch this step better in the video.
- Place the cookies with dulce de leche on a baking tray with a baking sheet. Put them in the freezer until the dulce de leche is firm. Meanwhile you can prepare the chocolate.
- In a microwavable bowl, add in chopped chocolate and butter. Melt them in the microwave with 30 seconds intervals. Stir well after each intervals. Pour the chocolate mixture in a tall and not that wide container, like a glass. This is to make it easier to dip and coat the dulce de leche later.
- After passed 20 minutes, it's time for the final step. Hold a cookie with your fingers and dip all the dulce de leche part in the melted chocolate. Lift up the cookie and let the excess chocolate drips off. Place the cookie on a baking tray or a serving container and let the chocolate sets before serving. Repeat with the rest. Enjoy!
Notes
Nutrition Facts
The nutrition facts provided are an estimate per serving. Accuracy is not guaranteed.












Comments
No Comments